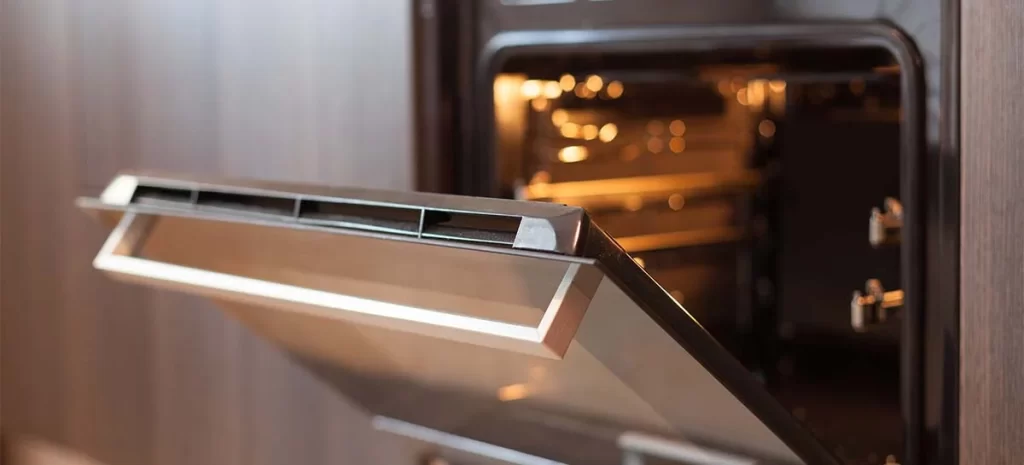
How to Make Your Oven More Energy Efficient

Making your oven more energy-efficient can help reduce your energy bills and minimize your carbon footprint. Here are some tips to improve the energy efficiency of your oven:

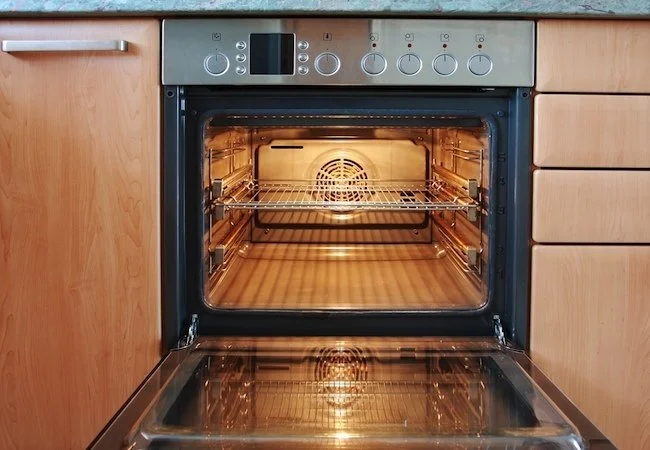
  1. Use the convection setting: Most modern ovens have a convection setting, which uses a fan to circulate hot air around the food. This can help your food cook more evenly and reduce cooking times by up to 25%, saving energy in the process.
  2. Preheat efficiently: While preheating is necessary for some recipes, it’s often unnecessary for others. For dishes like casseroles or roasted vegetables, you can skip the preheating step and place your food in the oven while it’s heating up.
  3. Use the right cookware: Opt for oven-safe glass or ceramic dishes and metal pans that conduct heat efficiently. These materials distribute heat evenly, allowing you to lower the cooking temperature or cook for a shorter time.
  4. Choose the right size cookware: Use cookware that matches the size of your dish or pan, so you’re not heating excess air inside the oven. Smaller dishes in a larger oven can lead to heat loss and increased energy consumption.
  5. Keep the oven door closed: Opening the oven door during cooking can cause a significant loss of heat, leading to longer cooking times and higher energy use. Use the oven light and window to check on your food’s progress instead.
  6. Cook multiple dishes at once: If you’re making multiple dishes that require different temperatures, try to plan your cooking so that you can cook as many dishes as possible in a single batch. This minimizes the number of times you need to preheat the oven.
  7. Batch cooking and leftovers: Cook larger quantities of food and store leftovers in the fridge or freezer. Reheating leftovers in the microwave or a toaster oven typically uses less energy than cooking a new meal from scratch.
  8. Thaw food before cooking: Allow frozen foods to thaw in the refrigerator before cooking. This reduces cooking time and energy consumption.
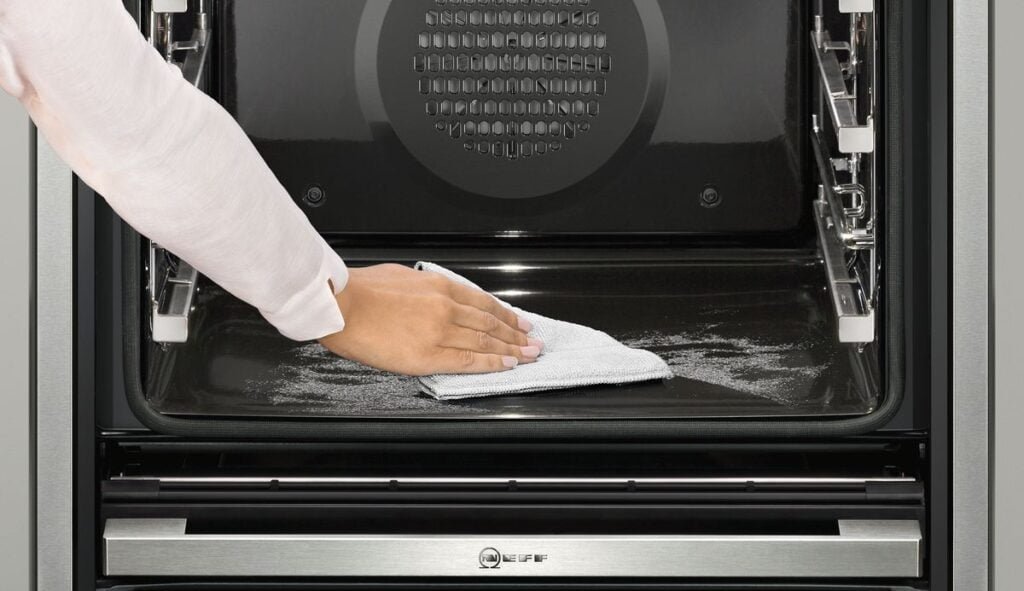
  9. Use the self-cleaning feature sparingly: Self-cleaning ovens use a lot of energy. Instead, clean your oven manually when it’s cool, using eco-friendly oven cleaners or natural cleaning methods.
  10. Maintain your oven: Keep the oven’s seals, gaskets, and hinges in good condition to prevent heat loss. Regularly clean the oven’s interior, as built-up residue can reduce its efficiency.
  11. Adjust your cooking times and temperatures: Get to know your oven’s quirks and adjust your recipes accordingly. You might find that it cooks hotter or cooler than the temperature you set, which can affect cooking times.
  12. Consider using smaller appliances: For small cooking tasks, like reheating leftovers or baking a single item, consider using a microwave, toaster oven, or countertop convection oven, which typically use less energy than a full-sized oven.

By implementing these tips, you can make your oven more energy-efficient, reduce your energy consumption, and save money on your energy bills.

Book a professional service

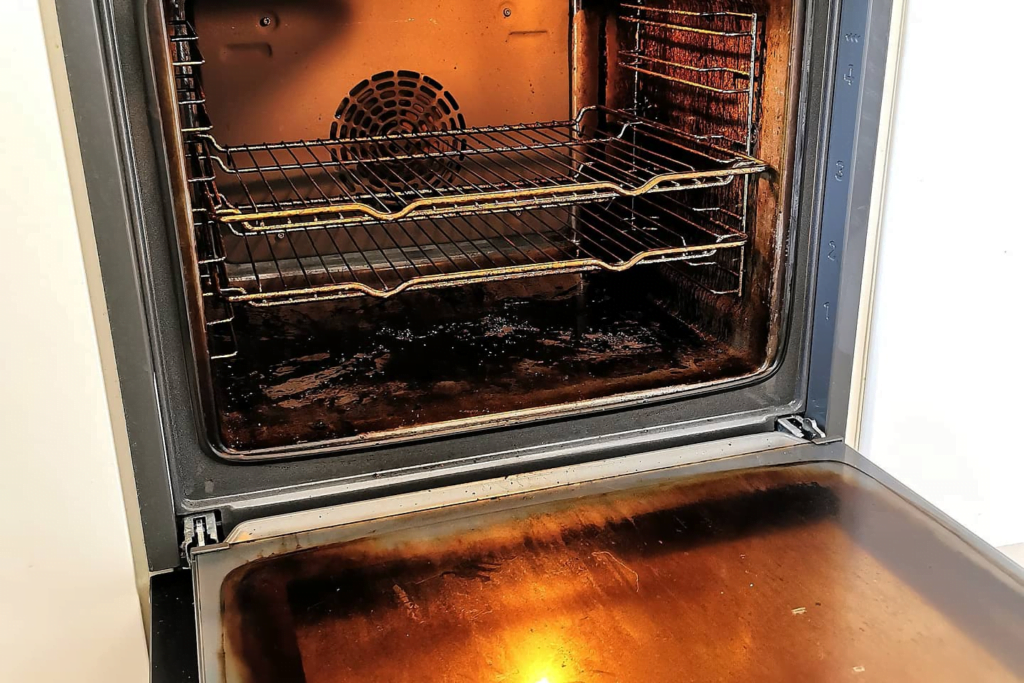
Sometimes greasy build-up in ovens is simply too challenging to be removed. Moreover, a thorough oven cleaning can be time-consuming and not exactly a very pleasant job. Fortunately, Shining Services has professional range cooker cleaners that have all the necessary tools and skills to deal with any cleaning situation and bring your Rangemaster oven back to life. We offer a range of cleaning services, created specifically to eliminate bacteria, viruses, and carbon residue while improving the overall energy efficiency and performance of your appliances. If you are worried that you don’t have enough time to deal with deep oven cleaning, feel free to contact us and we will be happy to come to your rescue.

How to clean self-cleaning oven

Cleaning a self-cleaning oven is relatively straightforward, thanks to its built-in self-cleaning cycle. Self-cleaning ovens have a feature that raises the temperature inside the oven to an extremely high level (usually around 900 degrees Fahrenheit or 475 degrees Celsius) to burn off food residue and grease. Here are the steps to clean a self-cleaning oven:

  1. Prepare the Oven:
    • Remove any racks, pans, or oven-safe items from the oven. The self-cleaning cycle can damage these items.
    • Wipe away any loose crumbs or debris from the oven’s interior.
  2. Read the Manual:
    • Refer to your oven’s manual for specific instructions on how to use the self-cleaning feature. Different oven models may have slightly different procedures.
  3. Ensure Adequate Ventilation:
    • Self-cleaning cycles produce a lot of heat and smoke, so make sure your kitchen is well-ventilated. Open windows and turn on the exhaust fan if possible.
  4. Start the Self-Cleaning Cycle:
    • Most ovens have a “Self-Clean” button or setting. Press this button to initiate the cleaning cycle.
    • Set the cleaning duration (typically 2-4 hours, but this can vary) based on your oven’s instructions.
  5. Lock the Oven Door:
    • The oven door will lock automatically during the self-cleaning cycle to prevent you from opening it while it’s extremely hot. Do not attempt to open the door during this time.
  6. Wait for the Cleaning Cycle to Finish:
    • The oven will heat up to a very high temperature and remain at that level for the set duration, usually around 2-4 hours.
    • During this time, it will incinerate food residue and grease, turning them into ash.
  7. Cooling Period:
    • After the cleaning cycle is complete, the oven will go through a cooling period. The door will remain locked until the oven cools down to a safe temperature.
    • This process can take several hours, so be patient.
  8. Clean Up Ash:
    • Once the oven has cooled and the door unlocks, you can open it and use a damp cloth or sponge to wipe away the ash that remains. You can also use a vacuum cleaner with a nozzle attachment to remove the ash.
  9. Clean the Racks:
    • Remove the oven racks from their designated cleaning position (usually below the oven) and wash them separately in warm, soapy water.
  10. Final Wipe Down:
    • After removing the ash and cleaning the racks, you may notice some residue on the oven’s interior. Wipe down the interior with a damp cloth to ensure it’s clean and free from any remaining ash.

Always follow the manufacturer’s instructions for your specific oven model, as the self-cleaning process can vary slightly from one brand or model to another. Additionally, it’s a good practice to perform self-cleaning cycles regularly to keep your oven in good condition and prevent the buildup of food residues and grease.

Book a professional oven cleaning service

Even though these methods can be quite easy, they can still take a lot of time, especially if you have to clean the whole oven and not just the racks. Save yourself the trouble and call Shining Oven today to book a professional oven cleaning technician. They use a highly effective dip tank method that includes disassembling the whole oven and cleaning the parts separately. After that, the expert will put your oven back together and you will get to enjoy your shiny clean cooker again. Better food and more time with the people that really matter! Book your oven technician today!

How to Clean Oven Racks Naturally

Anyone who cooks regularly knows that oven racks are magnets for grease and burnt-on grime. Over time, that buildup can cause smoke, uneven cooking, and unpleasant smells. Cleaning them isn’t exactly anyone’s favourite job — but it doesn’t have to be a nightmare either.

While many store-bought oven cleaners work fast, they often come with harsh chemicals that release fumes into your kitchen. If you’d rather skip the chemical smell and clean your racks safely, there are plenty of natural alternatives that work just as well.

Here’s how to clean oven racks using simple household products like baking soda, vinegar, dish soap, and even dishwasher tablets — all without damaging the metal or coating.

How Often Should You Clean Oven Racks?

For most households, cleaning oven racks every two to three months is enough to keep things under control. If you cook often or do a lot of roasting, it’s worth giving them a quick clean once a month. The longer grease and burnt food sit on the metal, the harder they become to remove later on.

Cleaning Oven Racks with Baking Soda and Vinegar

This classic natural cleaning method uses ingredients you already have at home and delivers excellent results.

You’ll need:

  • Baking soda (or borax if you have it)

  • White vinegar

  • A scrub pad or old toothbrush

  • An old towel

Here’s what to do:

  1. Line the bottom of your bathtub (or a large basin) with an old towel to prevent scratching.

  2. Place the oven racks on top of the towel.

  3. Pour white vinegar generously over the racks, then sprinkle baking soda on top.

  4. Let the mixture fizz for 10 to 15 minutes.

  5. Fill the tub with hot water until the racks are fully submerged, then leave them to soak overnight.

  6. The next day, scrub away any remaining grease with a scrub pad or toothbrush.

  7. If you come across stubborn spots, add a bit of kosher salt for a mild abrasive effect.

  8. Rinse the racks thoroughly with clean water and let them air dry before putting them back in the oven.

This method breaks down grease naturally and leaves your oven racks shining without any harsh chemicals.

Cleaning with Dish Soap

If you prefer something simple and gentle, dish soap works surprisingly well.

  1. Fill a bathtub or large container with hot water and lay an old towel at the bottom.

  2. Submerge the racks completely.

  3. Add half a cup of dishwashing liquid to the water and let everything soak overnight.

  4. In the morning, scrub the racks using the towel or an old brush.

  5. Rinse thoroughly with warm water and let them dry naturally.

For an extra boost, combine this with the baking soda and vinegar method. The reaction between the ingredients helps loosen stubborn grease faster.

Cleaning Oven Racks with Foil and Dishwasher Tablets

This trick sounds unusual but works incredibly well — it’s one of the easiest ways to clean racks with minimal scrubbing.

  1. Wrap each rack loosely in aluminium foil.

  2. Place the wrapped racks in your bathtub and fill it with hot water.

  3. Drop in two dishwasher tablets and let them dissolve.

  4. Leave the racks to soak for at least a few hours, or ideally overnight.

  5. Drain the tub, unwrap the racks, and watch as the grease wipes off easily.

  6. Rinse and air dry.

The reaction between the foil and the dishwasher tablets helps lift baked-on grime with almost no effort.

Cleaning Oven Racks in the Dishwasher

If your dishwasher is large enough, this is the most convenient option. Simply remove any loose debris from the racks first, then load them in. Use a standard wash cycle with hot water and no dishes inside. The racks will come out much cleaner, though you might still need to wipe away a few stubborn spots afterwards.

Why You Shouldn’t Use the Self-Cleaning Cycle for Oven Racks

It might seem tempting to throw your oven racks in during a self-cleaning cycle, but it’s not recommended. The extreme heat can damage the racks’ chrome or stainless steel coating, making them discoloured or rough to slide in and out. The process can also warp the metal slightly over time.

Hand-cleaning your racks, even just occasionally, will keep them in much better shape and extend their lifespan.

Keeping Your Oven Cleaner for Longer

Once your racks are sparkling, it’s worth adopting a few simple habits to keep them that way:

  • Wipe away spills as soon as the oven cools.

  • Use roasting bags or foil trays to reduce splatter.

  • Give racks a quick soak every month to prevent buildup.

  • Avoid using abrasive metal pads that can scratch and dull the surface.

When to Call a Professional

Natural cleaning methods work wonders, but they can take time and patience. If you’d rather skip the scrubbing — or if your entire oven needs a deep clean — consider booking a professional oven cleaning service.

Professionals use specialised dip-tank systems to soak and clean every removable part of the oven, including the racks, trays, and doors. The result is a spotless, grease-free appliance that looks brand new and is safe to cook in immediately afterwards.

Final Thoughts

Oven racks take a lot of abuse over time, but with regular care, they can stay shiny and functional for years. Whether you use baking soda and vinegar, dish soap, or the foil-and-tablet trick, natural cleaning methods are safer for your home and just as effective as store-bought products.

A clean oven doesn’t just look better — it cooks better too. Less smoke, no burnt smells, and evenly cooked food every time. Take the time to clean your oven racks naturally, and you’ll make your whole kitchen feel fresher.

How to Clean Electric Oven Grill

If you’ve ever noticed smoke billowing from your oven or your roast dinner suddenly tasting a bit burnt, your grill element might be to blame. The grill element — that metal bar positioned at the top of your oven — collects grease and food residue over time. When left uncleaned, that buildup burns each time you cook, creating smoke, odours, and even uneven heat.

Keeping this part of your oven clean is essential not only for hygiene but also for performance. A dirty grill element can affect how your oven cooks food and may even become a fire hazard if neglected. Luckily, with the right approach, it’s easy to clean it safely at home.

Before You Start

Before diving in, there are a few things to keep in mind:

  • Never scrape the grill element aggressively — the metal surface is delicate and can be damaged easily.

  • Avoid using any flammable cleaning products. Chemical residue plus heat can lead to dangerous fumes or even fires.

  • Once you’re done cleaning, always heat the oven empty for a short while to evaporate leftover moisture before using it again.

With those basics out of the way, let’s look at how to clean your grill element properly.

The Easiest Way to Clean the Grill Element

This simple method works for most household ovens and doesn’t require any disassembly.

  1. Turn your oven’s grill function on at a low to medium temperature — around 80°C to 120°C — for about 10 minutes. You’ll see the element begin to glow red.

  2. Make sure your extractor fan is on and your windows are open. A bit of smoke is normal as the heat burns off grease, but you’ll want plenty of ventilation.

  3. After 10 minutes, turn off the oven and unplug it. Allow it to cool completely.

  4. Once it’s safe to touch, spray a small amount of oven-safe cleaner or natural degreaser on a damp cloth and gently wipe the element. Avoid soaking it or spraying directly onto the metal.

This quick heat-and-wipe method softens baked-on grease, making it easier to remove. However, it mainly cleans the exposed side of the element — the back is harder to reach. If it still looks greasy, you can repeat the process.

Can You Remove the Grill Element to Clean It?

Technically, yes — but it’s not something most people should attempt. Removing the grill element involves unscrewing electrical fittings and disconnecting wires, and if reinstalled incorrectly, it can cause malfunctions or void your oven’s warranty.

If your element is heavily coated in grease or not heating evenly, it’s better to call a qualified oven technician. They can safely remove and clean or replace it if needed.

How to Prevent Grease Buildup on the Grill Element

A bit of prevention goes a long way. Every time you cook, tiny splashes of oil and food particles make their way upward. Here’s how to minimise that:

Cook at moderate temperatures.
Modern ovens work efficiently at around 180°C. Cooking at higher temperatures — especially 200°C and above — leads to more oil splatter and faster grease buildup on the grill element.

Avoid overfilled trays.
When roasting or baking, leave space at the top of your dish. Liquids that bubble over will splatter on the element and burn, creating smoke and that burnt smell that lingers for days.

Wipe down regularly.
A quick wipe after every few cooking sessions can make a huge difference. Waiting until grease is thick and burnt makes cleaning much harder later on. A weekly light clean keeps your oven fresh and smoke-free.

Why Keeping Your Oven Clean Matters

A clean oven doesn’t just look better — it works better. Built-up grime and grease affect how evenly heat circulates, leading to longer cooking times, higher energy use, and unevenly cooked food. In the worst cases, that buildup can ignite and cause dangerous flare-ups.

Cleaning your oven regularly has a few clear benefits:

  • Tastier food with no burnt smells

  • Faster, more even cooking

  • Reduced risk of fire or malfunction

  • Longer lifespan for your appliance

  • Less energy consumption and better efficiency

When to Call the Professionals

Let’s be honest — not everyone wants to spend their weekend scrubbing inside an oven. If you’re busy or just prefer a guaranteed deep clean, hiring a professional oven cleaning service is a smart choice.

A professional technician will dismantle your cooker, soak removable parts in special degreasers, and clean every corner of the appliance — including behind and around the grill element. Once everything is reassembled and tested, your oven will look and smell brand new. Best of all, it’s ready to use immediately after cleaning.

Final Thoughts

The grill element might not be the first thing you think to clean, but it plays a major role in how your oven performs. By maintaining it properly, you’ll enjoy better-tasting meals, cleaner air in your kitchen, and fewer problems down the road.

Take a few minutes after each cooking session to wipe away splatters, and once in a while, give the element a deeper clean using the safe heating method. And if it ever feels like too much work, a professional oven cleaning service can handle the job for you — safely, efficiently, and without the smell of burnt grease ever again.

How to Clean Oven Trays

Baking is fun — cleaning up afterwards, not so much. One of the most annoying kitchen tasks is scrubbing sticky, greasy oven trays. They collect burnt food, oils, and rust faster than any other cookware, and no one enjoys the sight of a tray that looks permanently stained.

Luckily, there are several simple and natural ways to bring your oven trays back to life. Whether you’re dealing with baked-on grease, burnt residue, or even rust, you can clean them effectively without harsh chemicals.

Here’s everything you need to know.

Types of Oven Trays

Before getting into the cleaning methods, it helps to know what kind of oven tray you’re working with. The material makes a big difference in how you should clean it.

Stainless steel
Durable and long-lasting, stainless steel trays are the most resistant to heat and damage. However, they still collect grease and can develop rust if neglected.

Aluminium
A cheaper and lighter option, aluminium trays heat up quickly but are more prone to scratches and corrosion. They also discolour more easily with heavy use.

Glass
Glass trays look great when new but can develop a brown tint and sticky residue over time. They’re non-reactive and easy to clean, but they can break if dropped or exposed to sudden temperature changes.

Understanding your tray type helps you choose the safest and most effective cleaning method.

How to Remove Baked-On Grease from Oven Trays

If you’ve just finished roasting and your tray looks like it’s been through battle, here’s how to deal with stubborn baked-on grease.

  1. Start by wiping away as much grease as you can with a paper towel.

  2. Fill your sink with hot water and add a generous amount of dishwashing liquid.

  3. Submerge the tray and let it soak for at least an hour. If the water doesn’t cover it completely, turn it occasionally.

  4. Use a sponge to scrub the tray. For non-stick trays, use a soft sponge to avoid scratching; for stainless steel, a slightly more abrasive pad is fine.

  5. Rinse with cold water and check your results. If any grease remains, repeat the process or run the tray through the dishwasher.

Hot water and time are your best friends when dealing with cooked-on grime.

Cleaning Oven Trays with Baking Soda and Vinegar

This natural combination is perfect for loosening tough grease and restoring shine.

  1. Mix equal parts of baking soda and white vinegar in a sink or large basin filled with hot water.

  2. Place the tray in the mixture and let it soak for about an hour.

  3. Once the fizzing stops, scrub gently with a non-scratch scouring pad.

  4. Rinse thoroughly and let the tray air dry.

This method not only removes stains but also neutralises odours — perfect if your tray smells a bit smoky from past roasts.

How to Clean Rust from Oven Trays

Rust is a common problem, especially for older metal trays. Don’t throw them away just yet — there are a few effective ways to fix it.

Using Steel Wool
Rub the rusty areas gently with steel wool, adding a drop of dish soap as lubrication. This helps prevent scratches while lifting rust. For delicate materials, use fine-grade steel wool instead.

Using Lemon Juice and Cream of Tartar
Mix equal parts lemon juice and cream of tartar into a thick paste. Spread it over the rusty areas and let it sit for about 30 minutes. The natural acid in the lemon helps dissolve the rust. Scrub gently, rinse with cold water, and dry well.

Using Baking Soda and a Potato
Cut a raw potato in half, dip the cut side into baking soda, and rub it over the rusty spots. The mild acid in the potato reacts with the baking soda to loosen the rust. This method is ideal for light rust layers. Rinse and dry the tray afterwards.

Preventing Rust and Grease Build-Up

Once your oven trays are clean, a little maintenance goes a long way. Here’s how to keep them looking their best:

  • Line trays with baking paper or foil when roasting to protect the surface.

  • Wipe away grease as soon as the tray cools down.

  • Soak trays in hot soapy water after each use to prevent residue from setting.

  • Avoid metal scouring pads on non-stick or delicate trays to prevent scratches.

  • Always dry your trays completely before storing them to stop rust from forming.

Why Cleaning Oven Trays Matters

Neglecting oven trays doesn’t just make them look unpleasant — it affects your cooking. Burnt grease can smoke and alter the taste of your food. Dirty trays also reduce heat efficiency, meaning your oven works harder and takes longer to cook meals evenly.

Regular cleaning not only improves food quality but also helps your oven run more efficiently and last longer.

Professional Oven Cleaning for Effortless Results

If you’ve tried all the DIY methods and your oven still looks worse for wear, it might be time to call in a professional. A professional oven cleaning technician will remove and deep-clean every part of your oven — including the trays, shelves, and glass door — using industry-grade, non-toxic cleaning solutions.

The process usually takes a few hours, and once finished, your oven is ready to use immediately. It’s an easy way to save time and get better results without the smell or stress of harsh chemicals.

Final Thoughts

Cleaning oven trays can be one of those household tasks we all dread, but it doesn’t have to be a chore. With a few simple ingredients like baking soda, vinegar, and lemon, you can restore your trays to their original shine safely and naturally.

Make it a habit to give them a quick soak after each use, and you’ll never have to battle with burnt-on grease again. And when life gets too busy — or your oven needs more than a light clean — a professional service can make it sparkle while you focus on what really matters.

How to Clean Grease Off an Oven

Ah, baking. There is nothing like the smell of fresh pie in the oven or the aroma of a baked good. But we all know what comes with any cooking adventure that involves using an oven – sticky, nasty, smelly GREASE! Luckily, we answer the age-old question of how to clean grease off an oven in our handy article!

So, if you happen to be someone who:

  • Has a busy schedule and hasn’t cleaned their oven in a while;
  • Found a very dirty oven in their newly rented property;
  • Has tenants that don’t like cleaning their ovens.

Why you need to clean grease off your oven

Besides looking disgusting, grease spots can actually become a significant issue for your cooking appliance and anything you cook in it. If your oven begins to form any grease or food bits that build up, over time, they will release carbon monoxide, nitrogen oxide and sulphur dioxide. The accumulated gases will start to leave a funny smell on the food you are cooking. Any leftover residue can be a fire hazard.

A dirty oven can be a breeding ground for bacteria and other harmful microorganisms. These can contaminate your food and make you sick if ingested. When grease builds up in your oven, it can affect it’s performance. The grease can block the heat source, reducing the oven’s ability to cook food evenly.

Clean the grease using vinegar and baking soda

If you happen to be someone who doesn’t fancy the idea of using commercial cleaners, then you can make your own homemade natural oven cleaner with three simple ingredients. You’ll need baking soda, white vinegar and water. Mix half a cup of water with 5-6 tablespoons of baking soda and stir it until it turns into a paste. Then, add half a cup of white vinegar and stir again until you get a frothy mixture. Now, here is how to use it to clean a greasy oven:

  • Remove everything – the oven racks, thermometers, pizza stone, etc. – the cooking appliance must be completely empty. You can wash them separately. Read on to find out how.
  • Put on some protective gloves. Evenly spread the paste on the interior without getting any of the cleaning solutions on the heating elements. Rub the mixture until it turns brown, concentrating on the extra greasy parts. Let the paste sit and do its magic for at least 12 hours.
  • Remove the baking soda mixture with a damp towel. If you find some parts a bit harder to wipe than others, get a plastic spatula and carefully scrape them off.
  • If you spot any greasy residue, pour some white vinegar into a spray bottle and spray the areas. Once the liquid makes contact with the baking soda, everything will start to bubble, but don’t worry – that’s a good thing.
  • Remove all leftover foam with a damp cloth to make your oven shiny again.  Replace everything you have taken out from the oven back inside.

Steam clean grease off the oven

Steam cleaning is an effective way to clean grease from your oven without using harsh chemicals.

  • Remove the oven racks and other removable parts from your oven.
  • Fill a large pot with water and bring it to a boil on your stove. Place the pot of boiling water in the bottom of your oven. Close the oven door and let the steam do its work for about 30 minutes. This will loosen the grease and make it easier to clean.
  • After 30 minutes, turn off the oven and let it cool down for a few minutes.
  • Use a damp cloth to remove the grease and any debris the steam has loosened. For tougher stains, you can use a non-abrasive scrubber or a soft-bristled brush to scrub the areas with the grease stains gently.
  • Once you’ve removed all the grease, use a clean, damp cloth to wipe the inside of the oven. Finally, rinse the cloth and wipe the inside of the oven again to remove any remaining residue.

Always follow the manufacturer’s instructions when using steam to clean your oven.

Clean the oven with a commercial oven cleaner

Sometimes, it takes more than 12 hours for the baking soda to dissolve the grease stains in your oven. In situations where you are in a hurry, buying a commercial cleaner specially created for oven cleaning is best.

  • Preheat your oven to 200°C (400°F). This will help to activate the cleaner when you apply it. Turn the oven off and let it cool down enough to touch. Preheating will help loosen any tough grease.
  • Remove any large pieces of debris or food from the oven. This will make it easier for the cleaner to penetrate the grease and grime.
  • Put on protective gear such as gloves and an apron to protect your skin and clothes from the chemical cleaner.
  • Spray the cleaner evenly over the interior surfaces of the oven. Be sure to follow the instructions on the label, as some cleaners may require you to apply the cleaner to a cool oven.
  • Close the oven door and leave the cleaner to work for the recommended time. Typically, this will be around 20 minutes.
  • Use a damp cloth or sponge to wipe away the cleaner and the dissolved grease and grime. Be sure to rinse the cloth or sponge frequently in warm water to remove any buildup.
  • Once you have removed all of the cleaner and grime, rinse the oven thoroughly with warm water to remove any residue.
  • Finally, allow the oven to dry completely before using it again.
  • Dispose of the can and any used cloths or sponges in accordance with the manufacturer’s instructions and local regulations.

How to clean a self-cleaning oven

While an oven might be self-cleaning, it doesn’t mean it won’t acquire some dirt over time. This is especially true when you’ve had them for ages! Generally, the normal self-cleaning process eliminates most dirt, but you may notice some leftover residue on the glass.

  • Use a mixture of water and baking soda for the glass. It should be enough to get rid of most grease stains. Be careful not to get any water near the barriers of the glass, however! It causes drips which are difficult to get rid of!
  • Remove any leftover food residue with a wet cloth or sponge. If you regularly wipe down the oven, it actually improves the self-cleaning function.
  • Some of the best tips are on the pages of your oven’s manual. Plus, they often give you the manufacturer’s recommendations, which can be helpful in maintaining your oven!

Using Enzyme spray to clean an oven

Enzyme sprays are great for those who want to clean their ovens without a tonne of chemicals. Not only are they toxic-free, but they are also fume-free and generally safe for your skin. However, you can still wear gloves if you want to be on the safe side.

Spray onto the grease and leave it for around 10 minutes. Then, wipe it away with a wet cloth, leaving your surfaces sparkling. Keep a bowl of water handy, and keep that cloth moist. Enzyme sprays are great for handling the toughest grease stains, as they are designed to clean organic stains. So, you should get results regardless of the oven’s state!

Help from household items

Can dishwasher tablets help clean an oven?

While it might sound strange, they’re brilliant for cleaning grime! We trust them for our dishes, cutlery and glasses. So, why wouldn’t we trust them for cleaning grease from an oven?

Take the more abrasive side of the tablet and gently rub the grease. Like the scraper, you shouldn’t need to add too much pressure for the grease to fall. Tablets won’t usually remove the more stubborn stains, but you can use a toothbrush or sponge to remove these.

Use a window scraper to clean grease from your oven

You might think, ‘hold on, that’ll damage the glass on the door’, but we promise it works! For thicker layers of grease, add a little bit of pressure, scrape, and presto! It’s off.

Splash some water down on the gunk that’s a bit more resilient. Scrape through the grease with the scraper, and it should slide right off. Quick, easy and effective. Be careful when adding too much pressure, as you may damage the glass.

Scrub your oven using a toothbrush

How is a toothbrush going to remove grease from your oven? Well, they’re actually great for getting into all the nooks and crannies you can’t scrub with normal utensils. Plus, they work much better than sponges at removing grease, as their bristles are much tougher on it.

Toothbrushes are especially useful for cleaning grease off oven racks. Any harder bits of grease will be removed like plaque on a tooth. You can also use a toothbrush on any small gaps around the oven too!

Need help cleaning your oven?

Why not leave the nasty chore to the professional hands of Shining Services?

We offer expert oven cleaning services, suitable for every type of cooker out there. With us, you get a mess-free service, don’t have to wait to use the appliance after we are done, and prolong its life span. Also, the detergents we use do not contain any caustic chemicals, making them extra safe. How awesome is that?

So, what are you waiting for? Stop worrying about how to clean grease off inside the oven door and make your cleaning appointment with Shining Services today!

How to Clean Your Cooker Hood

The cooker hood is your kitchen’s magnet for grease and grime. But that should come as no surprise, as that is its job. Located right above your hob, the cooker hood’s primary purpose is to attract all the smoke and steam that comes out of cooking food. So, there’s no avoiding some grease build-up in the extractor fan. What you can avoid, however, are large quantities of it, which can clog the hood filters and make them less effective and more susceptible to fire. Therefore, it’s mandatory to clean your extractor hood, immaculately. Follow this guide and learn how to clean your cooker hood professionally.

So if you:

  • Have a greasy cooker hood that doesn’t work the way it should.
  • Haven’t replaced/cleaned your cooker hood’s filters recently.
  • Noticed your kitchen is engulfed in a fog of fumes when cooking.

Then follow this guide and learn how to clean your cooker hood professionally.

How to clean a stainless steel cooker hood

Stainless steel hoods are the most popular variety in the UK. When they’re sparkly cleaned, they look amazing, when neglected, their run-down appearance can easily ruin your whole kitchen’s image. You can, however easily prevent your stainless steel extractor hood from reaching such a pitiful state. To clean your stainless steel cooker perfectly and without streaks, you will need the following product:

  • Bowl
  • Kettle
  • Sponge
  • An old toothbrush
  • J cloth
  • Bicarbonate of soda
  • Stainless steel oven cleaner
  • WD-40

Follow these steps:

  1. Before cleaning your stainless steel cooker hood, make sure to turn it off and wait for it to cool down.
  2. Take off the extractor cover and put it to the side.
  3. Mix a teaspoon of bicarbonate of soda with boiling water.
  4. Use your sponge to spread the soda solution on top of the hood. This will help loosen any grease on the hood and make it easier to get rid of.
  5. Wait around 20 minutes and wipe the solution off.

For tougher to clean areas, you’ll need some specific detergents designed for steel surfaces, like, for example, a stainless steel oven cleaner. Spay the cleaner across the hood surface and wipe it off gently with a j cloth (avoid using hard brushes). If there are any hard-to-reach spots on the bottom side of the hood, use an old toothbrush to clean them.

How to clean a glass cooker hood

Aside from a few subtle differences, glass hoods are cleaned similarly to stainless steel ones. For example, glass is considerably more delicate than steel and easier to chip.

To clean a glass hood, you will need to:

  1. Prepare a mixture of boiling water and baking soda(two full teaspoons).
  2. Use a soft cloth to spread the solution all over your glass hood surface.
  3. Start with the top part and slowly move onto the underside.
  4. Once the whole hood is covered in the mixture, wipe it off with a paper towel.
  5. Spray some glass cleaner on the hood and wipe it carefully with a jay cloth. For the finishing touch, add a layer of baby oil to give the glass its immaculate shine.

How to clean an extractor fan filter

Cleaning your extractor fan filters is a simple but essential process that you should not forget for many reasons. A dirty extractor fan can be a fire hazard due to filter clogging grease build-ups and lead to unpleasant smells every time you turn it on. On the other hand, by cleaning your extractor fan filter regularly, you’ll prevent some unwanted guests, such as cockroaches.

How to clean cooker hood carbon filters

Carbon filters are a crucial part of all recirculating cooker hoods. They remove all the smells and smoke that come from cooking your food. However, cleaning carbon filters at home by yourself is difficult, so replacing them at regular intervals is more viable. You can find a replacement cooker hood carbon filter in most DIY shops or consult with an appliance repair specialist to help you with the supply and replacement. You need to change the filter once every six months.

How to clean a metal mesh cooker hood filter

Extractor hood filters keep grease from entering the extraction vents. This prevents the vents from becoming clogged and impossible to clean. Most extractor hood filters are fine mesh grates which you can remove and clean or replace, easily.

Cleaning metal mesh cooker hood filters is simple:

  • Turn off the extractor;
  • Remove the filters from the hood;
  • Place them in a tub filled with boiling water mixed with baking soda (¼ cup) and dish soap. Let them sit for 20 minutes;
  • When it’s time to take them out, scrub them gently with a soft brush (to avoid damaging them); rinse the filters until all the built-up grease falls off;
  • Pat them dry and let them fully air dry for a few hours;
  • Reinstate the filters back into the extractor hood;

How to replace a cooker’s hood filter

You should change your one-off cooker hood filters regularly. Failure to do so may lead to ventilation complications.

Grease filters are most often seen inside vented cooker hoods. What’s great about these is that they have a clever way of reminding you when it’s time to change them. Check their colour! If the grease filter is saturated and discoloured, you probably need to buy a new one.

How to clean a cooker hood motor

The cooker hood motor is a small induction coil motor that requires next to no maintenance. Yet, the motor won’t perform well if you haven’t changed or cleaned your cooker hood filter in some time. This is because steam and vaporized grease can pass through dirty filters into the motor directly, causing it to cease working. Therefore, proper filter maintenance is the trick to a long-lasting cooker hood motor.

How to maintain your cooker hood clean

After all that hard work of cleaning your cooker hood and all its parts, it’s time you learned how to keep them all spotless.

  1. Wipe after use – make sure the unit is turned off and cool. Then, wipe the surface with a rag dipped in soapy water. Afterwards, use a dry rag to remove any watermarks or stains
  2. Clean your cooker hood regularly – By cleaning your cooker hood often, you will prevent grease build up. Frankly, if you clean it after each use, you probably won’t ever need to deep clean it, or at least not in a long while.
  3. Clean the filter once a month – all it needs is a quick wash in the sink.
  4. Cut down on frying – oil is the main source or grime build-up, so the less you fry food, the better. It’s also not very healthy so there’s that.

Need help with cleaning your cooker hood?

Cooker hood cleaning can be tough and time-consuming, so why not let the experts do it for you? The appliance cleaning professionals from Shining Services will use only the best tools and detergents to get your cooker hood sparkling in almost no time, no matter if it’s stainless steel or glass. So, save yourself some time and effort and leave the hood cleaning to us.

Why Does My Oven Smell Bad?

Have you ever wanted to cook a delicious dinner, but that desire disappeared as soon as you opened your cooker? Instead, you ask yourself, “Why does my oven smell so bad?” and “If my oven smells this bad, should I cook in it?”.

It may smell like burnt food, plastic or even chemicals.

Yes, ovens sometimes stink, and there can be many reasons for that. In this article, we’ll cover different oven smells, their causes and how to eliminate them.

Can you use the oven when it smells bad?

A bad oven smell can be caused by many things, including a gas leak or an electrical problem. For those reasons alone, it’s generally only recommended to use your oven once you find out if there isn’t a more significant issue that needs to be addressed.

Of course, If the smell is due to food spillage or burnt food, it’s best to clean the oven before using it again to avoid further unpleasant odours.

In any case, it’s important to identify and address the source of the smell before using the oven to ensure your safety and the proper functioning of the appliance.

The oven smells like burning food

Unfortunately, the most common reason ovens smell is the lack of proper cleaning. Since most food contains some amount of fat, grime and food debris steadily build up inside the oven after each use. When preheating, this fat melts and turns into grease, which covers the oven’s interior.

Some deposits on the glass surfaces, for example, are obvious and easy to clean. But burnt food and greasy residue can often get trapped between oven racks and trays. That’s why the oven smells when turned on and can be a fire hazard.

The best way to get the burnt smell out of your oven is to remove all accessories like racks, trays and pans, and thoroughly clean all the grease off them.

The oven smells like burning plastic

It’s important to stop using the oven immediately and investigate the source of the odour. The smell of burning plastic can be an indication of a serious problem, and continuing to use the stove could be dangerous.

Your oven may smell like burning plastic due to a melted plastic utensil or container that has accidentally come into contact with the heating element or a hot oven surface. To identify the source of the odour, turn off the oven and carefully inspect the interior, including the heating element and any accessories you have used in the oven recently.

If you do not find any plastic items or if the odour persists after removing the plastic item, it’s important to have the oven inspected by a professional. The smell could be caused by an electrical problem, such as a malfunctioning heating element or wiring. Continuing to use the oven when it smells like burning plastic could be dangerous, as it could lead to a fire or other serious damage.

New oven smell

You bought yourself a new oven, but when turned on, it smells like burning plastic or chemicals? That’s because of the insulation surrounding the oven cavity and its first exposure to heat. Also, this odour and the light oven smoke that may appear can be from the protective oil that manufacturers use in production.

To reduce the smell, you can try “burning in” your new oven by running it at a high temperature for a few hours before using it to cook food. This will help to burn off any residual manufacturing oils and materials and should help to reduce the smell.

Additionally, you can wipe down all the surfaces with the help of soapy water and a rag. Then run a proper burn-in cycle on the highest heat for 30 minutes. If the odour remains after the process, repeat the method a few more times.

If the smell persists for an extended period of time, or if you are concerned that it may be harmful, you should contact the manufacturer for assistance.

The oven smells like chemicals after cleaning

Cleaning an oven with the wrong products and following the wrong method can lead to a cooker coated with cleaning residue. Avoid the usage of ammonia or bleach-based products, as they leave behind chemical residue, which may reach the insulation. Once this happens, the oven can smell like chemicals when turned on.

It’s best not to take any risks with inappropriate cleaners and methods but to leave the chore in the hands of our professional oven cleaners. However, if you have used the wrong cleaning product and now your oven smells like chemicals when turned on, don’t worry! There are ways to naturally deodorise your oven and get rid of the bad oven smells.

How to freshen up a smelly oven

There are several natural ways to remove odours from your oven without having to resort to harsh chemicals or cleaners. Here are three methods that you can try:

  • Lemon – Cut a lemon into several slices and place them on a baking sheet. Preheat your oven to 250°F (120°C) and put the baking sheet with the lemon slices inside the oven for about 30 minutes. The heat from the oven will activate the lemon’s essential oils, which will help to neutralise any odours.
  • Bet on orange – It may seem too easy, but the citrus smell is fragrant. Similar to the lemon method, cut the fruit into slices and bake it for 10-15 minutes at the lowest temperature. This technique quickly removes the oven’s cleaner smell and emits a pleasant aroma, even when the oven has been turned off.
  • Deodorise with vanilla – Fill an oven-proof bowl with water and add one teaspoon of vanilla extract. Preheat the oven to 120 degrees Celsius and place the bowl in the oven for an hour. Check it every 15 minutes and add more water if needed, as there will be evaporation going on.

This method will not only deodorise your oven, but the whole house and will last all day.

Once you’ve tried one of these methods, wipe down the interior of your oven with a damp cloth to remove any residual odours. The good news is that these methods are also helpful and handy when cooking fish and you want to get rid of the fishy smell in the oven.

How To Clean The Hob Rings Of An Electric Cooker

Frequent cooking on your stovetop can cause accumulation of burnt-on food, grease and food residues, particularly under the electric cooker rings. But cleaning electric cooker hob rings thoroughly with products you may already have at home is easy if you know how!

So, if:

  • Your cooker rings emit a burned food smell when they‘re hot;
  • You can see food remnants on the hob rings;
  • You’re not sure what detergents to use;

Then, read on.

What you need to clean electric cooker hob rings

For regular cleaning of your stove’s electric hob, use damp lint-free fabric such as an old t-shirt to gently wipe down all surfaces. You could use specialised cleaning products but natural cleaning solutions are becoming increasingly popular.

Cleaning with store cupboard standbys

  • Baking soda;
  • Distilled white vinegar;
  • Spray bottle;
  • Scourer;
  • Microfibre cloth;
  • Paper towels;
  • A soft bristol brush or old toothbrush;
  • Oven cleaner;
  • Single-edged scraper.

Cutting grease with household ammonia

  • Household ammonia;
  • Rubber gloves;
  • 5-litre zip-top plastic bags;
  • Sponge;
  • Washing up liquid;
  • Bucket.

How to clean electric cooker hob rings step by step

1. Remove the electric stove burners

Cleaning the stove burners will be easier if you take them off. To do so, make sure the burners are completely cool, grip the edge and lift them above the sides of the drip pans. Rock back and forth for an easier release. Detach by tugging out the connections of any exposed wiring. If you encounter any difficulties, consult your user manual.

2. Clean the stove coil

Cleaning the coils is a relatively simple procedure if you follow these guidelines. First, remove the heating coils from your stove. Use a washing-up liquid and warm water mix to wipe off the electric heating coil. Scrub stains with a scourer and then dry with a lint-free cloth.

3. Deep clean an oven heating element

Make a paste with half a cup of baking soda and three tablespoons of water. Apply it carefully to the coils with a soft-bristled brush and let the paste sit for about 20 minutes. Spray with distilled vinegar, then carefully rinse and dry with a clean, lint-free cloth.

4. Clean the cooker rings with ammonia

Take two rings at a time and place them in a zip-top plastic bag. Fill the bottom of the bag with ammonia and leave it overnight. Carefully remove the rings keeping them away from your face, as the fumes will be very strong. Rub the rings to get rid of excess ammonia. After that, carefully rinse and dry with a lint-free cloth. Safely dispose of the bags.

5. Clean the drip pins

Drip pans are designed to catch any spills and drips and are located under the heating unit. They should ideally be cleaned after each use as allowing food remnants and grease to build up can potentially be a fire risk. If they’re rusty, they need to be replaced.

For fresh spills:

  1. Make sure the burners are cool before removing the coils and separating them from the drip pans.
  2. Add washing-up liquid to hot water and place pans in the sink or a bucket, and leave to soak for 10 minutes.
  3. Wipe down with a clean cloth or sponge.
  4. Dry with a clean microfibre cloth before reinstalling.

For stubborn stains:

  1. Shake the pans to get rid of loose food particles.
  2. Leave pans to soak in hot water and detergent for 10 minutes.
  3. Drain the water and add enough distilled white vinegar to cover the pans completely.
  4. Leave to soak for another 30 minutes.
  5. Sprinkle over a generous amount of baking soda which will react and fizz, and leave for 15 minutes.
  6. Then use a scourer to get rid of any stains that are left.
  7. Rinse the pans in hot water and dry them with a clean microfibre cloth.

Cleaning the drip pans with household ammonia

As previously mentioned, open a window or two and wear your protective gloves when working with ammonia.

  1. When the drip pans are cool place them separately in zip-top bags.
  2. Pour in a ¼ of a cup of household ammonia and seal the bags.
  3. Let them sit for around 12 hours for the fumes to cut through the grease and grime.
  4. Open the bags away from your face, as the fumes will still be very strong.
  5. Wash the pans in hot soapy water and then rinse well.
  6. Dry with a clean microfibre cloth.

Cleaning the drip pans with oven cleaner

  1. Place the dirty drip pans in the sink or bucket filled with hot water.
  2. Squirt a generous amount of washing-up liquid all over and let the pans soak for around an hour.
  3. Rinse the pans before spraying an even thick layer of oven cleaner over the entire area, and let sit for another hour.
  4. Rinse again.
  5. Repeat if necessary until the pans are clean.

6. Clean the stovetop

Try turning burners to the highest setting to burn off as much dirt as possible. This may cause a smoky atmosphere, so you’ll need to keep your windows open. As soon as the smoke stops rising, turn the burners off and allow them to cool. Then remove the burners and coils to allow easy access to the stovetop.

How do you clean a glass-top electric hob?

  1. Using a damp cloth spritz with a little distilled vinegar.
  2. Place two or three sheets of paper towel onto the hob, soak with a glass-approved cleaner and let it sit for a while.
  3. Wipe down the stovetop.
  4. Gently scrape away any leftover food remnants.

How to clean electric hob solid plates?

  1. Spray the vinegar generously over the stovetop.
  2. Sprinkle baking powder on top.
  3. Place a hot wet cloth on top and let it sit for 15 minutes.
  4. Remove the wet cloth and wipe it down with a clean, dry microfibre cloth.

Alternatively, cleaning your solid plate hob can be done with a hob scraper to get rid of excess food remnants and then gently rub in a hob cleaner to remove any grime that’s left. Rinse with warm water before drying with a clean microfibre cloth.

Need help? Contact the experts!

If you don’t know how to clean your electric oven elements or haven’t got the time or the tools to do so then simply get in touch with our professional oven cleaning services. Your cooker will be inspected, disassembled and cleaned on-site. Book a specialist oven cleaning team and get perfect results!

Why Hiring a Professional Cleaner

Moving out of a rental property is a long and tiring process that often needs to be done on a tight schedule. You find yourself occupied with packing and arranging your belongings and, on top of that, you have to also find time to get your property deep cleaned.

Not only is it ethical to leave it in excellent condition, but if you don’t, you actually risk losing your security deposit. If you feel swamped with moving-out tasks, getting help from a professional cleaning service might be worth considering. This blog post will help you better understand the benefits of hiring end-of-tenancy cleaners, so you can decide whether it’s worth investing money in that kind of service.

Saves you a lot of time

When moving out, you have a huge to-do list, including, notifying your work place or school, decluttering, packing, transporting your belongings safely, etc. All of this is no small project on its own, but perhaps one of the most time-consuming activities is cleaning the place.

Professionals know how to be efficient and use their time wisely to transform the rental property in half the time a standard DIY cleaning would normally take.

Thanks to specialised training, years of experience and by using effective cleaning products and equipment, they can clean the whole property, leaving no stone unturned. While you may have to take a few days off work to do everything, an expert cleaner can finish it all in a few hours. And since moving out is often time-sensitive, opting for a professional end of tenancy cleaning service makes even more sense.

No cleaning effort required from you

End of tenancy cleaning isn’t the same as your day-to-day house cleaning. You have to up your cleaning game to ensure the property is up to standard. Tasks you’ve been putting off for years, like descaling a heavily stained toilet, scrubbing every part of the bathroom or washing the windows inside out, should be done before you give away your keys.

In other words, end of tenancy cleaning takes a lot of effort and may leave you drained before even finishing half the house. Hiring professionals can take your mind off all the cleaning and focus your effort on other aspects of moving out.

Ensures thorough cleaning

Your landlord or property manager expects to find the house in a spotless condition, which is demanding. Without professional help, it’s challenging to get each nook and cranny cleaned to perfection and missing important elements happens quite often. Professional cleaners use checklists and are experts at tackling all areas in the property, even the hard-to-reach ones like:

  • Under/behind kitchen appliances: Most of us neglect the space under or behind kitchen appliances and they are known to collect a lot of dust, food debris and grime.
  • Ovens: Cleaning the oven takes a lot of work because of the grease build-up. Additionally, in order to get all the dirt off, parts of the appliance may have to be disassembled, like the door, for instance. This requires knowledge and skill that experienced cleaners have for sure. They can not only clean the oven effectively, but also put everything back together, so no damage is caused to the appliance.
  • Carpets: Carpets collect a lot of stains over the years and the expert hot water extraction cleaning method professionals use is the best chance to eradicate them for good. Any unpleasant smells can be eradicated, too. Learn here whether landlords can charge for carpet cleaning at the end of the tenancy.
  • Baseboards: Baseboards collect a lot of dust, especially in high-traffic areas and they often are skipped during a standard DIY cleaning.
  • Walls: Walls get covered by stains and smudges, which build up and become permanent unless cleaned periodically. A professional cleaner can take care of these, as well.
  • Top shelves of tall cabinets: The higher shelves are often hard to reach and might need special equipment, like a cordless vacuum.
  • Light fixtures and door knobs: They need to be wiped down, and while it’s not hard, you could easily forget them.
  • Bathrooms: Bathrooms require a lot of work and there is a lot of ground to cover, even more so if there is a mould problem. With the proper cleaning agents and skill, all can be removed.

Increases the chances of receiving a full security deposit back

A good 56% of disputes between landlords and tenants are related to insufficient cleaning. Although a landlord cannot force a tenant to hire a professional cleaning company for the move out cleaning, it’s stillexpected from the tenant to abide by a high cleaning standard. After all, the rental property will have to be as clean as when the tenant first moved in, otherwise deduction from the security deposit is imminent.

So, it’s worth to consider whether hiring a professional cleaning service is the better option if you do not feel confident or lack the necessary time to achieve the expected cleaning standard yourself.

Expertise in handling specific cleaning requirements

Professional cleaners can handle all cleaning requirements, even those specific to your property or type of furniture. Whether you need to deep-clean carpets, sanitise your kitchen, or remove stubborn stains, they can do everything you request.

The well-trained cleaning professionals are knowledgeable of different cleaning products and techniques. They can assess your specific cleaning needs and recommend the best solutions to achieve the desired results.

Moreover, professional cleaning companies use specialised tools and equipment like high-powered vacuums, steam cleaners, and pressure washers. These tools enable them to clean and sanitise your rented property, ensuring it is free from dirt, dust, and other contaminants.

Minimises health risks

Standard cleaning products often contain chemicals that can be harmful, especially if handled by more sensitive people with allergies or other conditions. The products could cause respiratory problems or skin irritation, among other things. In addition, dust and dirt that stir up during cleaning can trigger allergies and asthma, as well. So, all of these things need to be considered before undertaking such an extensive cleaning.

You may also risk injuring yourself if you’re attempting to clean surfaces or objects too high, like glass windows, light fixtures, etc. Straining your back while lifting and moving heavy furniture from carpets is a common injury, which you should avoid.

Hiring a professional gives you peace of mind

As mentioned above, hiring a professional end of tenancy cleaner gives you peace of mind for several reasons. The specialists you hire have experience getting the best cleaning results in less time, with efficiency and professionalism.

Moreover, they are trained to work with different tools and equipment that may prove challenging for the untrained hand. They will also provide all of these when you hire them, so you don’t have to worry about finding any of it. And they take extra safety precautions when operating equipment like vacuum cleaners and pressure washers.

If you’re worried about accidents, professional cleaners have insurance, meaning you will be covered against damages. In case you or your landlord are unsatisfied with the cleaning, we at ShiningServices will be happy to send a cleaning crew for a redo. We are always ready to assist you, no matter the scope or complexity of your cleaning task.