1.svg)
 CALL US FOR FREE QUOTE


 Blog
Blog About us
 1.svg) Contact
Contact.svg) Bookings
Bookings Cleaning address
 Requisites (for business)
 1.svg) Contact details
Contact details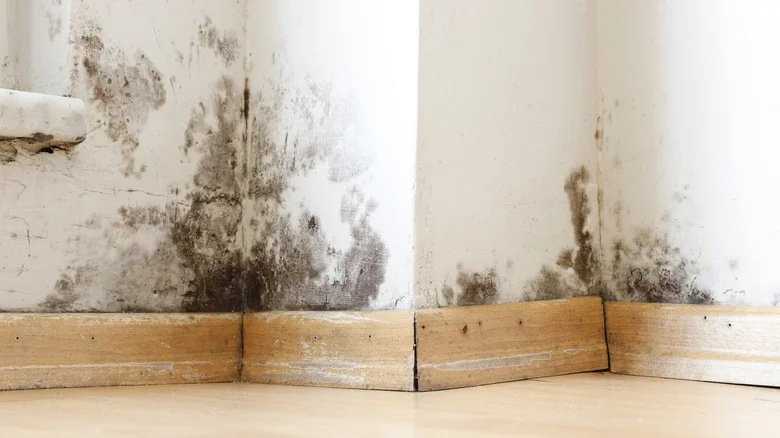
How to Get Rid of Mold
Mold is a common household problem that can affect both the appearance and health of your home. Not only does it create unsightly stains, but it can also pose serious health risks if left untreated. Here’s a step-by-step guide to help you effectively remove mold and prevent its return.
Supplies You’ll Need
- Protective Gear: Gloves, mask, and goggles to protect yourself from mold spores.
- Scrubbing Brush or Sponge: For scrubbing the affected areas.
- Mold Removal Solution: You can use commercial mold removers or make your own (e.g., a mixture of water and vinegar, or water and baking soda).
- Spray Bottle: For applying cleaning solutions.
- Buckets: For rinsing and collecting water.
- Microfiber Cloths or Paper Towels: For drying and wiping surfaces.
- Dehumidifier: To reduce humidity levels in the affected area.
Step-by-Step Instructions
Step 1: Identify the Source of Moisture
Before addressing mold, identify and eliminate the source of moisture that encourages its growth. Common sources include:
- Leaky roofs, windows, or pipes
- High humidity levels (above 60%)
- Poor ventilation in bathrooms or kitchens
Step 2: Protect Yourself
Mold can be harmful, so it’s important to protect yourself. Wear gloves, a mask, and goggles to avoid inhaling spores or having skin contact with mold.
Step 3: Prepare Your Cleaning Solution
- Vinegar Solution: Pour undiluted white vinegar into a spray bottle. Vinegar is effective against many types of mold.
- Baking Soda Solution: Mix 1 cup of baking soda with a few cups of water in a spray bottle. Baking soda helps eliminate mold and deodorizes.
- Commercial Mold Remover: If you prefer, use a store-bought mold remover according to the manufacturer’s instructions.
Step 4: Apply the Cleaning Solution
- Spray: Generously spray the moldy area with your chosen cleaning solution. Ensure it’s saturated for effective mold removal.
- Let It Sit: Allow the solution to sit for 10-15 minutes. This helps to break down the mold.
Step 5: Scrub the Affected Area
Using a scrubbing brush or sponge, scrub the moldy surface. For textured surfaces like drywall or tile, use a stiff brush to reach all the crevices. Be thorough but gentle to avoid damaging the surface.
Step 6: Rinse and Dry
- Rinse: After scrubbing, rinse the area with clean water to remove any mold and cleaning residue. Use a bucket for rinsing if necessary.
- Dry: Wipe the area with a dry microfiber cloth or paper towels to remove moisture. Ensure the area is completely dry, as mold thrives in damp conditions.
Step 7: Dispose of Contaminated Materials
If you find any porous materials like carpets or insulation that are heavily contaminated with mold, it may be best to discard them. Seal them in a plastic bag before disposal to avoid spreading spores.
Step 8: Prevent Future Mold Growth
- Control Humidity: Use a dehumidifier in damp areas to keep humidity levels below 60%. This is especially important in basements and bathrooms.
- Improve Ventilation: Ensure proper airflow in your home. Open windows when weather permits and use exhaust fans in kitchens and bathrooms.
- Regular Cleaning: Regularly clean areas prone to mold, such as bathrooms and kitchens, with vinegar or other mold-killing solutions.
- Repair Leaks Promptly: Fix any leaks in pipes, roofs, or walls immediately to prevent mold growth.
Conclusion
Removing mold is essential for maintaining a healthy home environment. By following these steps, you can effectively get rid of mold and prevent it from returning. Remember, if you encounter extensive mold growth or underlying water damage, it may be best to consult a professional.
Takeaway Tips
- Identify and fix moisture sources to prevent mold growth.
- Use vinegar or baking soda as natural mold removers.
- Keep humidity below 60% using dehumidifiers.
- Ensure good ventilation to reduce moisture buildup.