1.svg)
 CALL US FOR FREE QUOTE


 Blog
Blog About us
 1.svg) Contact
Contact.svg) Bookings
Bookings Cleaning address
 Requisites (for business)
 1.svg) Contact details
Contact details
How to Get Milk Out of Carpet?
Milk spills on the carpet can be tricky to clean due to the risk of leaving behind a sour smell if not treated properly. To prevent any lingering odors or stains, it’s important to act fast and follow the right steps. Here’s a step-by-step guide to help you remove milk from your carpet and prevent odors.
Step 1: Blot Up the Milk
The first step is to remove as much of the spilled milk as possible to avoid it soaking into the carpet fibers.
- Use Paper Towels or Cloth: Grab some paper towels or a clean cloth and gently blot the area. Press firmly to absorb the milk but avoid rubbing, as rubbing can push the milk deeper into the carpet.
- Repeat: Continue blotting until you’ve soaked up as much of the liquid as possible. Replace the towels or cloth as they become saturated.
Step 2: Rinse with Cold Water
Rinsing the area with water will help dilute any remaining milk and make it easier to remove.
- Dampen a Cloth: Soak a cloth in cold water and wring it out. Avoid hot water, as heat can cause the milk proteins to set into the carpet.
- Blot the Area: Use the damp cloth to blot the milk-stained area, lifting more of the milk out of the carpet.
- Blot Dry: After rinsing, use a dry towel or cloth to blot up the excess moisture.
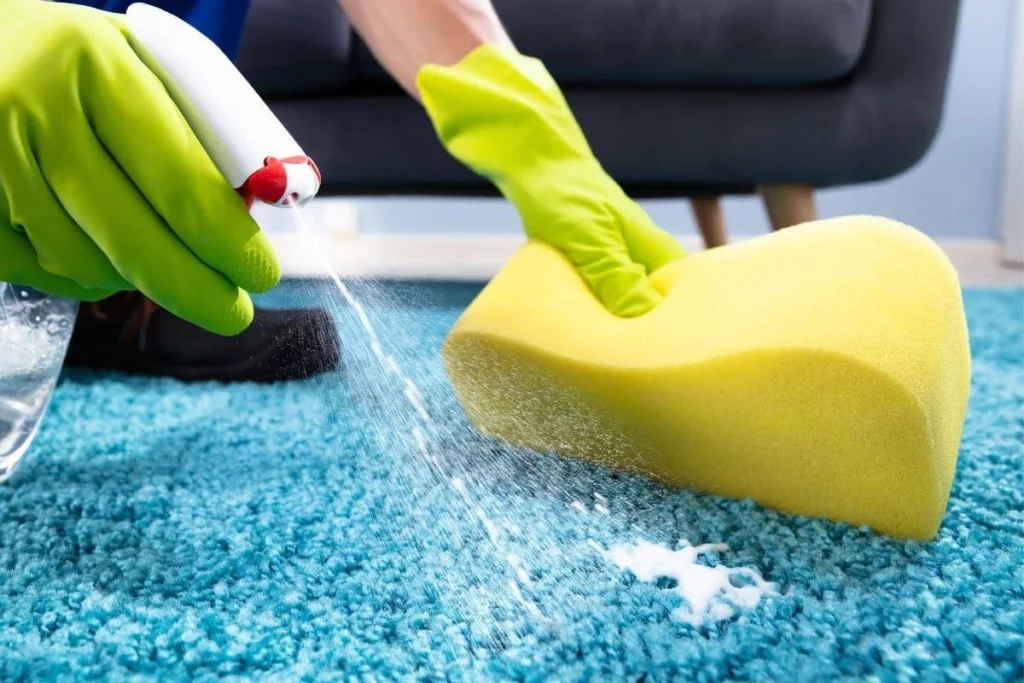
Step 3: Apply a Cleaning Solution
Now it’s time to apply a cleaning solution that will remove both the milk stain and any potential odors.
Option 1: Vinegar Solution
- Mix: In a spray bottle, combine 1 cup of warm water, 1 tablespoon of white vinegar, and a few drops of mild dish soap.
- Spray the Area: Lightly spray the affected area with the solution.
- Blot the Stain: Use a clean cloth to blot the solution into the carpet. Work from the outside of the stain inward to avoid spreading it.
- Rinse with Water: After blotting the stain, rinse the area by blotting with a cloth soaked in plain water to remove the cleaning solution.
Option 2: Baking Soda Paste
- Mix: Combine baking soda and water to create a thick paste.
- Apply: Spread the paste over the milk-stained area and let it sit for 15-20 minutes. Baking soda helps absorb moisture and neutralizes odors.
- Vacuum: Once the paste has dried, vacuum the area to remove the baking soda.
Step 4: Neutralize Odors
Milk can leave behind a sour smell if it’s not fully removed. To ensure no odors linger, follow up with an odor neutralizer.
Baking Soda Method:
- Sprinkle Baking Soda: After the area is dry, sprinkle a generous amount of baking soda over the spot.
- Let It Sit: Leave the baking soda on the carpet for several hours, or overnight, to absorb any remaining odors.
- Vacuum: Once the baking soda has had time to work, vacuum it up thoroughly.
Step 5: Dry the Carpet
Ensuring the carpet dries fully is crucial to prevent mold or mildew growth.
- Towel Dry: Use a dry towel to press firmly into the carpet, soaking up as much moisture as possible.
- Use a Fan or Open Windows: Increase airflow by using a fan or opening windows to help the carpet dry faster. You can also use a hairdryer on a cool setting for smaller areas.
Step 6: Monitor for Odors
After cleaning, it’s important to keep an eye (and nose) on the spot to make sure no milk smell returns. If you notice any lingering odor, repeat the cleaning process or use an enzyme-based cleaner specifically designed for breaking down organic matter like milk.
Additional Tips:
- Use Enzyme Cleaner: If the milk smell persists, you can use an enzyme cleaner designed to break down proteins and fats in the milk. Follow the instructions on the product for best results.
- Steam Cleaning: If the spill is large or has been sitting for a while, consider using a steam cleaner to thoroughly sanitize the area and remove deeper milk residues.
- Test First: Always test any cleaning solution on a small, inconspicuous area of the carpet to make sure it doesn’t cause discoloration or damage.
Conclusion
Milk spills can be a hassle, but with prompt action and the right cleaning techniques, you can prevent stains and sour odors from setting in. Using simple household items like vinegar, baking soda, and water, you can effectively remove the milk and leave your carpet clean and fresh.