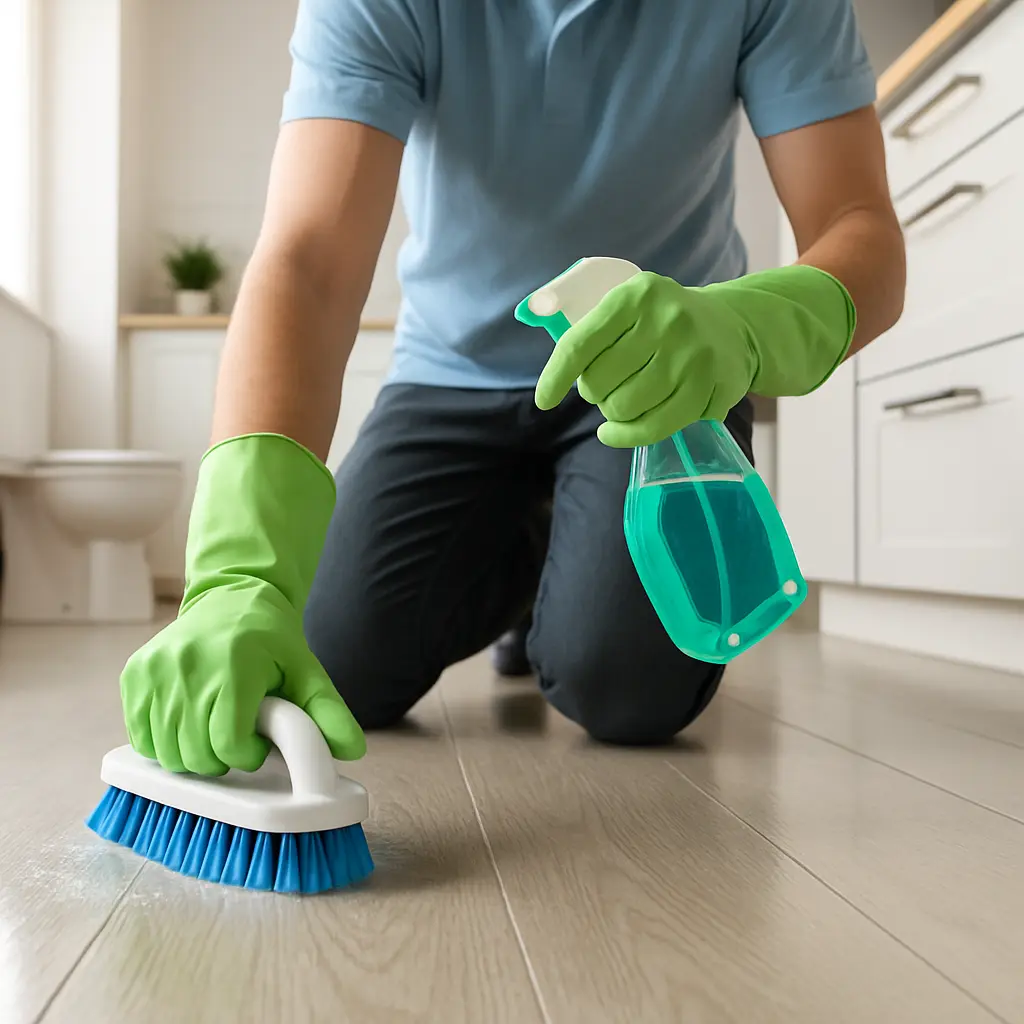
How to Get Blood Out of Carpet?

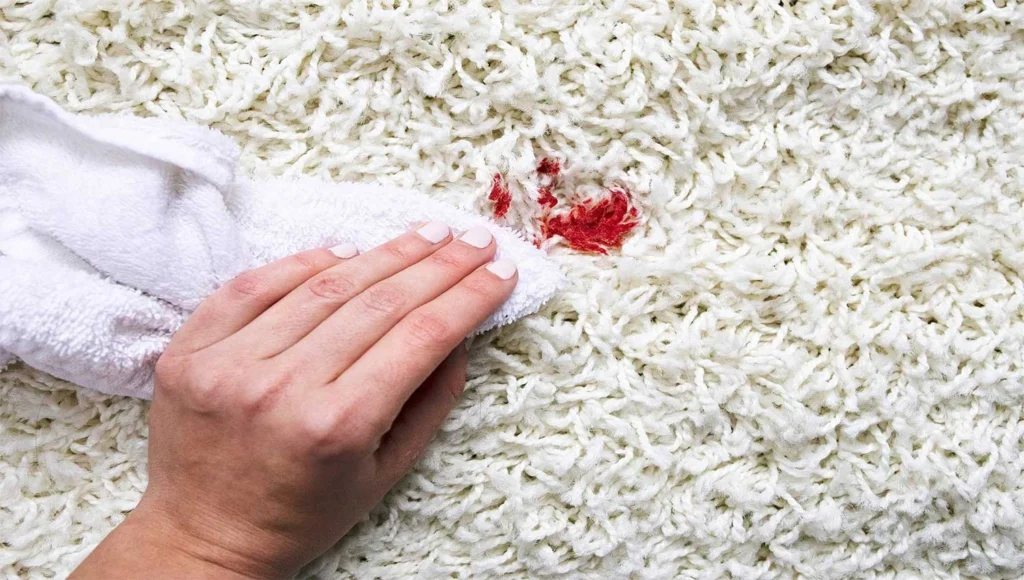
Blood stains on carpet can be challenging to remove, but acting quickly can help you restore your carpet’s appearance. Whether it’s a minor cut or a more significant spill, follow these steps to effectively remove blood from your carpet.

Step 1: Blot the Blood Stain Immediately

Prompt action is crucial for preventing the blood from setting into the carpet fibers.

  • Use Paper Towels or a Clean Cloth: Gently blot the stain to absorb as much blood as possible. Avoid rubbing, as this can spread the stain.
  • Work from the Outside In: Blot from the outer edges of the stain toward the center to avoid expanding the stain.

Step 2: Rinse with Cold Water

Cold water is effective for blood stains, as hot water can cause the proteins in the blood to set, making the stain harder to remove.

  • Dampen a Cloth or Sponge: Soak a clean cloth in cold water, then wring it out so it’s damp but not dripping.
  • Blot the Stained Area: Gently blot the blood-stained area to lift more of the stain. Be sure to use cold water only, as heat can set the stain.

Step 3: Apply a Cleaning Solution

If the stain persists after rinsing with cold water, it’s time to use a cleaning solution.

Option 1: Dish Soap Solution

  • Mix: In a bowl, combine 1 tablespoon of dish soap with 2 cups of cold water.
  • Apply: Dampen a cloth or sponge with the solution and gently blot the stain. Work from the outside in, similar to previous steps.
  • Blot to Lift the Stain: Continue blotting until the stain begins to lift.

Option 2: Hydrogen Peroxide (For Stubborn Stains)

Hydrogen peroxide is effective for removing blood stains, but it may lighten some carpet colors, so always test in an inconspicuous area first.

  • Apply Hydrogen Peroxide: Pour a small amount of 3% hydrogen peroxide directly onto the stain. Let it sit for about 5-10 minutes.
  • Blot the Area: After the time has passed, blot the area with a clean cloth to absorb the stain and peroxide. Repeat as necessary until the stain is removed.

Step 4: Rinse Again

After treating the stain, it’s important to rinse the area to remove any remaining cleaning solution.

  • Use Clean Water: Dampen a cloth with cold water and blot the area to rinse out any soap or peroxide residue.
  • Blot Dry: Use a dry towel to blot the area, removing excess moisture.

Step 5: Dry the Carpet

Proper drying is essential to prevent mold and mildew growth.

  • Towel Dry: Use a clean, dry towel to press firmly into the carpet, soaking up as much moisture as possible.
  • Air Dry: Allow the area to air dry completely. You can use a fan or open windows to speed up the process.

Step 6: Check for Residual Stains

Once the area is dry, check for any remaining stains. If necessary, repeat the cleaning process.

Option 3: Baking Soda Paste (For Remaining Stains)

  • Mix Baking Soda Paste: Combine baking soda with water to create a thick paste.
  • Apply: Spread the paste over the stained area and let it sit for 15-20 minutes.
  • Vacuum: Once dry, vacuum up the baking soda to lift any remaining stain.

Additional Tips:

  • Avoid Hot Water: Always use cold water for blood stains, as hot water can cause the proteins to bond with the carpet fibers.
  • Use Salt for Fresh Stains: If the stain is fresh, you can sprinkle salt over it to absorb the blood. After a few minutes, vacuum it up and follow the cleaning steps.
  • Test Cleaning Solutions: Always test any cleaning solution on a hidden area of the carpet to ensure it won’t cause discoloration.

Conclusion

Removing blood stains from carpet may seem daunting, but with quick action and the right cleaning techniques, you can restore your carpet to its original condition. Remember to use cold water, gentle blotting motions, and appropriate cleaning solutions for the best results.

How to Remove Foundation from Carpet?

Spilling foundation on your carpet can seem like a disaster, but with the right steps, you can remove the stain and keep your carpet looking fresh. Whether it’s a liquid or powder foundation, prompt action and the correct cleaning methods will help you get rid of the stain effectively. Here’s how to remove foundation from carpet step by step.

Step 1: Blot the Foundation (If It’s Liquid)

If the foundation is liquid, it’s important to act quickly to prevent it from seeping deeper into the carpet fibers.

  • Use a Clean Cloth or Paper Towels: Blot the area gently to soak up as much foundation as possible. Avoid rubbing, as this can spread the stain further.
  • Blot from the Outside In: Work from the outer edges of the stain toward the center to keep the stain from spreading.

Step 2: Remove Excess Powder (If It’s Powder Foundation)

For powder foundation spills, you’ll need to remove as much of the powder as possible without pushing it into the carpet.

  • Use a Vacuum Cleaner: Lightly vacuum the area to pick up the loose powder. Make sure to use the hose attachment and avoid pressing down too hard, as this could push the powder deeper into the carpet.
  • Gently Blot: After vacuuming, you can use a soft, dry cloth to gently blot any remaining powder on the surface.

Step 3: Apply a Cleaning Solution

Once you’ve removed the excess foundation, it’s time to treat the stain with a cleaning solution. You can use a homemade mixture or a commercial carpet cleaner.

Homemade Cleaning Solution:

  • Mix: Combine 1 tablespoon of mild dish soap with 2 cups of warm water.
  • Apply: Dampen a clean cloth or sponge with the solution and gently blot the stained area. Be sure not to oversaturate the carpet.
  • Blot the Stain: Work the solution into the carpet by gently blotting. Again, avoid scrubbing, as this can push the foundation deeper into the fibers.

Step 4: Rinse the Area

After applying the cleaning solution, you’ll want to rinse out the soap to avoid leaving residue behind.

  • Use Clean Water: Dampen another cloth or sponge with clean, cool water.
  • Blot the Area: Gently blot the area to remove any remaining soap and foundation. This will help prevent dirt from sticking to the carpet later.

Step 5: Dry the Carpet

Once the stain is treated, it’s important to dry the area to avoid any moisture damage.

  • Blot Dry: Use a clean, dry towel or paper towels to absorb as much moisture as possible. Press down firmly to help lift any remaining liquid.
  • Air Dry: Allow the area to air dry completely. You can speed up the drying process by using a fan or opening windows.

Step 6: Check for Stubborn Stains

If the foundation stain persists, repeat the cleaning process. For more stubborn stains, you may want to consider using a stronger cleaner.

Use Rubbing Alcohol:

  • Apply Rubbing Alcohol: Dampen a cotton ball or cloth with rubbing alcohol and gently blot the remaining stain. Rubbing alcohol can help dissolve oil-based foundations.
  • Rinse and Dry: After using the rubbing alcohol, blot the area with water and dry it thoroughly.

Additional Tips:

  • Test First: Always test any cleaning solution on a small, hidden part of your carpet to ensure it won’t cause discoloration or damage.
  • Use Makeup Remover Wipes: For small foundation stains, makeup remover wipes can help break down the product. Gently blot the stain with the wipe and follow up with a soapy solution and water.
  • Avoid Heat: Do not use a hairdryer or steam cleaner on foundation stains, as heat can set the stain into the carpet fibers.

Conclusion

Accidentally spilling foundation on your carpet doesn’t have to result in a permanent stain. With quick action, the right cleaning solutions, and careful blotting, you can remove foundation from carpet and restore its appearance. Just remember to be gentle and patient for the best results.

How to Get Milk Out of Carpet?

Milk spills on the carpet can be tricky to clean due to the risk of leaving behind a sour smell if not treated properly. To prevent any lingering odors or stains, it’s important to act fast and follow the right steps. Here’s a step-by-step guide to help you remove milk from your carpet and prevent odors.

Step 1: Blot Up the Milk

The first step is to remove as much of the spilled milk as possible to avoid it soaking into the carpet fibers.

  • Use Paper Towels or Cloth: Grab some paper towels or a clean cloth and gently blot the area. Press firmly to absorb the milk but avoid rubbing, as rubbing can push the milk deeper into the carpet.
  • Repeat: Continue blotting until you’ve soaked up as much of the liquid as possible. Replace the towels or cloth as they become saturated.

Step 2: Rinse with Cold Water

Rinsing the area with water will help dilute any remaining milk and make it easier to remove.

  • Dampen a Cloth: Soak a cloth in cold water and wring it out. Avoid hot water, as heat can cause the milk proteins to set into the carpet.
  • Blot the Area: Use the damp cloth to blot the milk-stained area, lifting more of the milk out of the carpet.
  • Blot Dry: After rinsing, use a dry towel or cloth to blot up the excess moisture.

Step 3: Apply a Cleaning Solution

Now it’s time to apply a cleaning solution that will remove both the milk stain and any potential odors.

Option 1: Vinegar Solution

  • Mix: In a spray bottle, combine 1 cup of warm water, 1 tablespoon of white vinegar, and a few drops of mild dish soap.
  • Spray the Area: Lightly spray the affected area with the solution.
  • Blot the Stain: Use a clean cloth to blot the solution into the carpet. Work from the outside of the stain inward to avoid spreading it.
  • Rinse with Water: After blotting the stain, rinse the area by blotting with a cloth soaked in plain water to remove the cleaning solution.

Option 2: Baking Soda Paste

  • Mix: Combine baking soda and water to create a thick paste.
  • Apply: Spread the paste over the milk-stained area and let it sit for 15-20 minutes. Baking soda helps absorb moisture and neutralizes odors.
  • Vacuum: Once the paste has dried, vacuum the area to remove the baking soda.

Step 4: Neutralize Odors

Milk can leave behind a sour smell if it’s not fully removed. To ensure no odors linger, follow up with an odor neutralizer.

Baking Soda Method:

  • Sprinkle Baking Soda: After the area is dry, sprinkle a generous amount of baking soda over the spot.
  • Let It Sit: Leave the baking soda on the carpet for several hours, or overnight, to absorb any remaining odors.
  • Vacuum: Once the baking soda has had time to work, vacuum it up thoroughly.

Step 5: Dry the Carpet

Ensuring the carpet dries fully is crucial to prevent mold or mildew growth.

  • Towel Dry: Use a dry towel to press firmly into the carpet, soaking up as much moisture as possible.
  • Use a Fan or Open Windows: Increase airflow by using a fan or opening windows to help the carpet dry faster. You can also use a hairdryer on a cool setting for smaller areas.

Step 6: Monitor for Odors

After cleaning, it’s important to keep an eye (and nose) on the spot to make sure no milk smell returns. If you notice any lingering odor, repeat the cleaning process or use an enzyme-based cleaner specifically designed for breaking down organic matter like milk.

Additional Tips:

  • Use Enzyme Cleaner: If the milk smell persists, you can use an enzyme cleaner designed to break down proteins and fats in the milk. Follow the instructions on the product for best results.
  • Steam Cleaning: If the spill is large or has been sitting for a while, consider using a steam cleaner to thoroughly sanitize the area and remove deeper milk residues.
  • Test First: Always test any cleaning solution on a small, inconspicuous area of the carpet to make sure it doesn’t cause discoloration or damage.

Conclusion

Milk spills can be a hassle, but with prompt action and the right cleaning techniques, you can prevent stains and sour odors from setting in. Using simple household items like vinegar, baking soda, and water, you can effectively remove the milk and leave your carpet clean and fresh.

How to Get Vomit Smell Out of Carpet?

Vomit stains and their lingering odor can be a challenge to remove from carpets. Fortunately, with the right approach and some household products, you can effectively eliminate both the stain and the smell. Follow this step-by-step guide to get your carpet fresh and clean again.

Step 1: Clean Up the Vomit Immediately

Acting quickly can prevent the vomit from seeping deeper into the carpet fibers, making it easier to clean and deodorize.

  • Use Gloves: Put on gloves to protect your hands from bacteria.
  • Remove Solid Material: Use paper towels or a plastic scraper to pick up any solid chunks. Be gentle to avoid pushing the vomit deeper into the carpet.
  • Blot the Liquid: If the vomit is more liquid, use a clean cloth or paper towels to blot (not rub) the area to absorb as much liquid as possible.

Step 2: Treat the Stain

Once you’ve removed the bulk of the vomit, you can start treating the stain.

Homemade Cleaning Solution:

  • Mix: Combine 1 cup of warm water with 1 teaspoon of mild dish soap (make sure it’s clear, not colored) and 1 tablespoon of white vinegar.
  • Apply: Using a spray bottle, apply the solution to the stained area or dab it on using a sponge.
  • Blot the Area: Use a clean cloth or sponge to blot the solution into the stain, working from the outer edges inward. Avoid scrubbing, as this could damage the carpet fibers.
  • Rinse: After blotting, use a damp cloth (soaked in clean water) to remove the cleaning solution from the carpet.

Step 3: Neutralize the Odor

Vomit can leave behind strong odors, so this step is crucial to eliminate any lingering smells.

Baking Soda Method:

  • Sprinkle Baking Soda: Once the area is dry or slightly damp, sprinkle a generous amount of baking soda over the affected area. Baking soda is a natural deodorizer and will absorb odors from the carpet.
  • Let It Sit: Leave the baking soda on the carpet for several hours, or ideally overnight, to allow it to absorb the smell.
  • Vacuum: After the baking soda has had time to work, vacuum it up thoroughly.

For Stubborn Smells: Use Enzyme Cleaner

If the vomit smell persists, consider using an enzyme cleaner designed to break down proteins and odors, especially for organic stains like vomit.

  • Apply Enzyme Cleaner: Spray or pour the enzyme cleaner onto the affected area, following the manufacturer’s instructions.
  • Let It Soak: Allow the enzyme cleaner to sit for the recommended time, usually 10-15 minutes, to break down the odor-causing bacteria.
  • Blot and Rinse: Blot up the excess liquid with a clean cloth and rinse with clean water if needed.
  • Dry the Area: Let the area air dry completely, or use a fan to speed up the drying process.

Step 4: Dry the Carpet Thoroughly

To prevent mold or mildew, ensure that the carpet dries thoroughly after cleaning.

  • Towel Dry: Use a dry towel to absorb any excess moisture by pressing it firmly into the carpet.
  • Use a Fan or Open Windows: Improve ventilation by opening windows or using a fan to help the carpet dry faster.

Additional Tips:

  • Use a Carpet Cleaner: If the stain and odor are particularly stubborn, you can rent or use a carpet cleaner with a suitable cleaning solution.
  • Steam Cleaning: For deeper cleaning, consider using a steam cleaner, which can help sanitize the area and remove tough odors.
  • Test First: Always test any cleaning solution, including homemade remedies, in a small, inconspicuous area of the carpet to ensure it doesn’t cause discoloration or damage.

Conclusion

With quick action and the right cleaning methods, you can effectively remove vomit and its smell from your carpet. Using baking soda, enzyme cleaners, and thorough drying will help eliminate both stains and odors, leaving your carpet fresh and clean once more.

How to Buff Out Scratches on a Car?

Scratches on your car can be frustrating, especially when they affect its overall appearance. While deeper scratches may require professional help, many light or surface-level scratches can be buffed out at home with the right techniques and materials. Here’s a comprehensive guide to help you buff out scratches and restore your car’s glossy finish.

Materials You’ll Need:

  • Microfiber cloths: For cleaning and polishing.
  • Car wash soap: To clean the surface.
  • Scratch removal compound or rubbing compound: To remove or minimize the appearance of scratches.
  • Polishing compound: To restore shine.
  • Wax: To protect the area after buffing.
  • Dual-action polisher (optional): For quicker and more efficient buffing.
  • Water spray bottle: To keep the area moist during the buffing process.
  • Masking tape: To protect surrounding areas of the paint.

Step-by-Step Guide:

1. Clean the Affected Area

  • Start by thoroughly washing the scratched area with car wash soap and water. Dirt and debris can cause more scratches during the buffing process if they are not removed. Dry the area completely with a clean microfiber cloth.

2. Assess the Depth of the Scratch

  • Scratches vary in depth, and it’s important to know whether the scratch has only affected the clear coat or if it’s deeper into the paint. Run your fingernail over the scratch. If your nail catches, the scratch may be too deep for simple buffing, and you might need professional repair. Surface scratches that don’t catch your fingernail are typically fixable at home.

3. Prepare the Area

  • For scratches near edges or trim, use masking tape to protect areas you don’t want to buff or accidentally damage. This is especially helpful if you’re using a machine buffer.

4. Apply Scratch Removal Compound

  • Take a small amount of scratch removal compound (or rubbing compound) and apply it directly to the scratched area. Use a clean microfiber cloth or an applicator pad to spread the compound evenly over the scratch.

5. Buff the Scratch

  • If buffing by hand, use a clean microfiber cloth and rub the compound in small, circular motions. Apply moderate pressure as you work over the scratched area. Continue buffing until the compound starts to disappear or the scratch becomes less visible.
  • If using a dual-action polisher, apply the compound to a foam pad and gently press it onto the scratch. Turn on the polisher and move it in slow, overlapping passes across the scratch. Be sure to keep the polisher moving to avoid overheating the area.

6. Check Progress

  • After buffing for a few minutes, wipe away any excess compound with a clean microfiber cloth. Check the scratch to see if it has improved. If it’s still visible, you can repeat the process until the scratch is no longer noticeable.

7. Polish the Area

  • Once the scratch is buffed out, use a polishing compound to restore the shine to your car’s paint. Apply a small amount of polish to a clean applicator pad or microfiber cloth and rub it in circular motions. If using a polisher, use the same process as with the compound. Polish the area until it matches the surrounding surface.

8. Wax for Protection

  • After polishing, apply a layer of car wax to protect the freshly buffed area and maintain the shine. Use a microfiber cloth or wax applicator pad to spread a thin layer of wax over the area. Let the wax dry for a few minutes, then buff it off with a clean cloth to a shiny finish.

Tips for Success:

  • Use a Water Spray Bottle: Keep a water spray bottle handy to lightly mist the area as you buff. This helps keep the surface cool and prevents the compound from drying out too quickly.
  • Work in Small Sections: If you’re working on multiple scratches or a large area, break it into smaller sections to ensure consistent results.
  • Don’t Overbuff: Buffing too aggressively can remove too much of the clear coat or paint, causing permanent damage. Be gentle, especially when using a machine buffer.
  • Test on a Hidden Spot: Before buffing a highly visible area, test the scratch removal compound on an inconspicuous part of the car to ensure it doesn’t damage the paint.

Additional Solutions for Deeper Scratches:

If the scratch is too deep to be fully buffed out, you may need to explore other options:

  • Touch-Up Paint: For deep scratches that have penetrated the base coat, touch-up paint can fill in the scratch and help blend it with the surrounding paint.
  • Clear Coat Pen: Clear coat pens are useful for scratches that have only affected the clear coat. These pens can fill in the damaged area and protect the underlying paint.
  • Professional Repair: If the scratch is deep into the paint or metal, it’s best to take your car to a professional body shop for repair.

Conclusion:

Buffing out scratches on your car is an effective way to maintain its appearance and protect its paintwork. With the right materials and techniques, many surface-level scratches can be successfully removed at home. Regular maintenance, such as waxing and careful cleaning, can also help prevent future scratches.

How to Fix Deep Scratches on a Plastic Dashboard

Deep scratches on a car’s plastic dashboard can be frustrating, especially since they can detract from the overall appearance of your vehicle’s interior. Luckily, repairing these scratches is possible with the right tools and techniques. Here’s a step-by-step guide to help you fix deep scratches on your plastic dashboard and restore its original look.

Materials You Will Need

  • Plastic filler or epoxy putty: For filling deep scratches.
  • Plastic cleaner: For cleaning the surface before starting.
  • Sandpaper (800 to 1500 grit): To smooth the surface before and after applying filler.
  • Dashboard protectant: To restore shine and protect the surface after repair.
  • Fine-tipped spatula or applicator: For applying filler.
  • Microfiber cloth: To clean and polish the surface.
  • Plastic restorer or dye (optional): To match the dashboard’s original color.

Step-by-Step Guide

1. Clean the Area

  • Start by cleaning the dashboard thoroughly with a plastic cleaner. Use a microfiber cloth to remove dust, dirt, and oils from the surface. Make sure the scratched area is completely clean and dry before proceeding.

2. Sand the Scratched Area

  • Use fine-grit sandpaper (800-1000 grit) to sand down the edges of the scratch. This step smooths out rough edges and prepares the surface for filler. Be careful not to sand too aggressively, as you only want to focus on the scratched area.

3. Apply Plastic Filler or Epoxy Putty

  • For deep scratches, plastic filler or epoxy putty works best. Mix the filler according to the manufacturer’s instructions, and use a fine-tipped spatula or applicator to apply it directly into the scratch.
  • Spread the filler evenly over the scratch, ensuring that it fills the entire depth of the scratch. Smooth out the surface as much as possible using the spatula, and allow the filler to dry completely. The drying time will vary depending on the product, so follow the instructions carefully.

4. Sand Again for a Smooth Finish

  • Once the filler has dried, sand the repaired area again using a higher-grit sandpaper (1000-1500 grit). Gently sand the filled-in scratch until the surface is smooth and flush with the surrounding area. Use light pressure to avoid sanding off too much of the filler.

5. Apply Plastic Restorer or Dye (Optional)

  • If the repaired area looks dull or doesn’t match the original color of the dashboard, you can apply a plastic restorer or dye that matches your dashboard’s color. This will help blend the repaired area with the rest of the dashboard. Apply the product according to the manufacturer’s instructions and allow it to dry.

6. Use a Dashboard Protectant

  • After the repair is complete, apply a dashboard protectant over the entire surface to restore shine and provide a layer of protection. A protectant will also help prevent future scratches and UV damage.

7. Buff the Surface

  • Finally, use a clean microfiber cloth to gently buff the area until it blends seamlessly with the rest of the dashboard. This will help remove any excess product and give the dashboard a smooth, polished finish.

Additional Tips

  • Test on a Hidden Area: Before applying filler or restorer to a visible section of the dashboard, test it on an inconspicuous area to ensure color and texture matching.
  • Avoid Harsh Chemicals: When cleaning or applying products to your dashboard, avoid using harsh chemicals that could damage the plastic.
  • UV Protectant: After the repair, consider applying a UV protectant regularly to prevent fading or cracking caused by sun exposure.

Conclusion

Repairing deep scratches on a plastic dashboard is a manageable task with the right tools and materials. By following this guide, you can restore your dashboard’s appearance and prevent the damage from worsening over time. Regular maintenance and the use of protective products can help keep your dashboard looking its best for years to come.

How to Clean Stainless Steel Appliances

Stainless steel appliances can add a modern touch to your kitchen, but they can also show fingerprints, smudges, and stains if not properly maintained. Cleaning these surfaces requires a gentle touch and the right techniques to avoid scratching or damaging the finish. Follow this guide to keep your stainless steel appliances looking shiny and new.

Supplies You’ll Need

  • Microfiber cloths: Soft and non-abrasive to prevent scratches.
  • Mild dish soap: For cleaning without harsh chemicals.
  • White vinegar: A natural cleaner that helps remove smudges and disinfect.
  • Olive oil or baby oil: For polishing and enhancing shine.
  • Baking soda: Effective for removing stubborn stains.
  • Spray bottle: For mixing and applying cleaning solutions.

Step-by-Step Instructions

Step 1: Prepare Your Cleaning Solution

  1. Mix Soapy Water: In a bowl, mix a few drops of mild dish soap with warm water. This will be your primary cleaning solution.
  2. Vinegar Solution: Fill a spray bottle with equal parts white vinegar and water. This solution is great for cutting through grime and removing fingerprints.

Step 2: Clean the Stainless Steel Surface

  1. Wipe with Soapy Water: Dampen a microfiber cloth in the soapy water solution and wring it out until it’s just damp. Wipe the stainless steel surface in the direction of the grain to avoid scratches.
  2. Rinse and Dry: After wiping, rinse the cloth with clean water, wring it out, and wipe the surface again to remove any soap residue. Dry the area thoroughly with a dry microfiber cloth to prevent water spots.

Step 3: Remove Stubborn Stains

  1. Apply Baking Soda: For tough stains or stuck-on food, sprinkle baking soda directly on the stain.
  2. Gently Scrub: Use a damp cloth to gently scrub the area in a circular motion, following the grain of the stainless steel.
  3. Rinse and Dry: Wipe away any baking soda residue with a damp cloth, then dry thoroughly with a clean microfiber cloth.

Step 4: Polish the Surface

  1. Use the Vinegar Solution: Spray the vinegar solution onto the clean surface and wipe it down with a clean microfiber cloth. This helps to remove any remaining smudges and adds shine.
  2. Apply Olive Oil: For added shine, put a small amount of olive oil or baby oil on a clean cloth. Buff the surface gently in the direction of the grain. This not only adds shine but also creates a protective layer that helps resist fingerprints.

Additional Tips

  • Avoid Abrasive Cleaners: Never use steel wool, scouring pads, or abrasive cleaners, as they can scratch the surface of stainless steel.
  • Wipe Down Regularly: To keep your appliances looking new, make it a habit to wipe them down regularly with a damp microfiber cloth.
  • Use a Dedicated Cleaner: If you prefer, you can purchase stainless steel cleaner from the store. Ensure it’s safe for use on stainless steel and follow the manufacturer’s instructions.
  • Test First: If using a new product or solution, test it on a small, inconspicuous area first to ensure it does not cause damage.

Conclusion

Cleaning stainless steel appliances doesn’t have to be complicated. With the right supplies and methods, you can keep your kitchen looking pristine and welcoming. Regular maintenance is key to preserving the shine and avoiding tough stains.

Takeaway Tips

  • Use microfiber cloths to avoid scratching the surface.
  • Follow the grain of the stainless steel when cleaning and polishing.
  • Regularly wipe down appliances to prevent buildup.
  • Use olive oil for added shine and protection against fingerprints.

How to Unclog a Shower Drain

A clogged shower drain can be a frustrating problem that disrupts your daily routine. Hair, soap scum, and other debris often contribute to blockages. Fortunately, there are several effective methods to clear the clog and restore your shower to its normal function. Follow these steps to unclog your shower drain safely and efficiently.

Supplies You’ll Need

  • Plunger: A standard plunger can help dislodge clogs.
  • Drain snake or auger: A handy tool for reaching deeper clogs.
  • Baking soda: A natural deodorizer and mild abrasive.
  • White vinegar: Effective for breaking down buildup.
  • Hot water: To help dissolve grease and soap scum.
  • Rubber gloves: To protect your hands during cleaning.
  • Bucket: To catch any water or debris.

Step-by-Step Instructions

Step 1: Remove Visible Debris

  1. Clear the Drain Cover: If your shower has a drain cover or grate, remove it to access the drain more easily.
  2. Manually Remove Debris: Use your hands (wearing rubber gloves) or a pair of tweezers to pull out any visible hair, soap, or debris from the drain.

Step 2: Use a Plunger

  1. Fill the Shower with Water: Fill the shower with enough water to cover the bottom of the drain by a few inches. This will create a better seal with the plunger.
  2. Plunge the Drain: Position the plunger over the drain and push down firmly, then pull up quickly. Repeat this action several times to create suction, which can help dislodge the clog.
  3. Check for Movement: After plunging, check if the water begins to drain. If it does, you may have cleared the clog.

Step 3: Apply Baking Soda and Vinegar

  1. Pour Baking Soda: Measure about 1 cup of baking soda and pour it directly into the drain.
  2. Add Vinegar: Follow the baking soda with 1 cup of white vinegar. You should see fizzing and bubbling, which indicates that the reaction is working to break down the clog.
  3. Let It Sit: Allow the baking soda and vinegar mixture to sit for at least 30 minutes. This gives it time to work on any buildup.
  4. Flush with Hot Water: After 30 minutes, boil a pot of water and carefully pour it down the drain to flush away the loosened debris.

Step 4: Use a Drain Snake

  1. Insert the Snake: If the clog persists, insert a drain snake into the drain. Push it in until you feel resistance, indicating the clog.
  2. Rotate the Snake: Turn the handle of the snake clockwise to catch any debris. Pull it out slowly to remove hair and gunk.
  3. Clean Up: After using the snake, flush the drain with hot water to clear any remaining debris.

Step 5: Check the Trap

  1. Locate the P-Trap: If your shower drain is still clogged, you may need to check the P-trap (the curved pipe under the drain).
  2. Remove the Trap: Place a bucket underneath to catch any water, then unscrew the trap to clean it out manually. Remove any buildup, then reassemble the trap.
  3. Flush the Drain: After cleaning the trap, flush the drain with hot water to ensure it’s clear.

Maintenance Tips

  1. Regular Cleaning: Clean your shower drain regularly to prevent clogs. Use a hair catcher or drain screen to catch hair and debris before they enter the drain.
  2. Avoid Pouring Grease: Never pour grease or oil down the drain, as these can solidify and cause blockages.
  3. Use Baking Soda Monthly: Pour a mixture of baking soda and vinegar down the drain monthly to help break down any buildup and keep your drains fresh.
  4. Be Cautious with Chemicals: Avoid using harsh chemical drain cleaners, as they can damage your pipes and are often ineffective against organic matter.

Conclusion

Unclogging a shower drain doesn’t have to be a daunting task. By following these steps and maintaining your drain regularly, you can keep your shower running smoothly and free from unpleasant odors.

Takeaway Tips

  • Clear visible debris from the drain before attempting other methods.
  • Use baking soda and vinegar as a natural solution for minor clogs.
  • Regular maintenance can prevent future blockages.
  • Check the P-trap for stubborn clogs if the issue persists.

How to Clean a Laptop Screen

Keeping your laptop screen clean is essential for clear visibility and maintaining the overall condition of your device. Dust, fingerprints, and smudges can accumulate over time, affecting your viewing experience. Follow these steps to safely and effectively clean your laptop screen.

Supplies You’ll Need

  • Microfiber cloth: Soft and non-abrasive, ideal for cleaning screens without scratching.
  • Distilled water: Pure water without minerals to avoid streaks and residues.
  • White vinegar (optional): A natural cleaner that can help remove tough stains.
  • Spray bottle: For mixing and applying your cleaning solution.
  • Isopropyl alcohol (optional): Can be used for disinfecting, but must be diluted properly.

Step-by-Step Instructions

Step 1: Turn Off and Unplug Your Laptop

  1. Power Down: Turn off your laptop and unplug it from any power source to avoid electrical damage or accidental input during cleaning.
  2. Remove Peripherals: Disconnect any external devices like mice, USB drives, or external monitors.

Step 2: Prepare Your Cleaning Solution

  1. Mix the Solution: Create a cleaning solution by mixing equal parts distilled water and white vinegar in a spray bottle. Alternatively, you can use a 70% isopropyl alcohol solution mixed with distilled water in a 1:1 ratio. Avoid using harsh chemicals or ammonia-based cleaners, as they can damage the screen.
  2. Shake Gently: Shake the bottle gently to mix the solution.

Step 3: Wipe the Screen

  1. Dampen the Cloth: Lightly spray your microfiber cloth with the cleaning solution. Important: Never spray the solution directly onto the laptop screen, as it can seep into the edges and damage the internal components.
  2. Wipe in Circular Motions: Gently wipe the screen using circular motions. Start from the center and work your way outwards. This helps to prevent streaks and ensures an even clean.
  3. Tackle Stubborn Spots: For stubborn stains or fingerprints, you can apply a little more pressure, but be careful not to press too hard, as this can damage the screen.

Step 4: Dry the Screen

  1. Use a Dry Microfiber Cloth: After cleaning, use a separate, dry microfiber cloth to wipe the screen again. This helps remove any remaining moisture and prevents streaks.
  2. Ensure It’s Dry: Allow the screen to air dry completely before closing the laptop or turning it back on.

Step 5: Clean the Laptop Body

  1. Wipe the Laptop Surface: Use a damp microfiber cloth with the same cleaning solution to wipe down the laptop body, keyboard, and trackpad. Be cautious around the keyboard area to avoid excess moisture.
  2. Dry Thoroughly: Use a dry cloth to ensure no moisture remains, particularly around ports and openings.

Maintenance Tips

  • Regular Cleaning: Aim to clean your laptop screen once a week or whenever you notice fingerprints and smudges.
  • Keep It Covered: Use a laptop sleeve or cover when not in use to minimize dust accumulation.
  • Use a Keyboard Cover: Consider using a keyboard cover to protect the keyboard from dust and spills, which can also help reduce screen smudges.
  • Avoid Touching the Screen: Try not to touch the screen with your fingers, as this can lead to oil and dirt buildup.

Conclusion

Cleaning your laptop screen is a simple yet effective way to enhance your viewing experience and prolong the life of your device. By following these steps and maintaining a regular cleaning routine, you can keep your laptop looking pristine and functioning optimally.

Takeaway Tips

  • Turn off and unplug your laptop before cleaning.
  • Use a microfiber cloth to avoid scratches and streaks.
  • Dampen the cloth, not the screen, to prevent moisture damage.
  • Regularly clean to maintain clarity and performance.

How to Clean a Coffee Maker

Keeping your coffee maker clean is essential for maintaining its performance and ensuring great-tasting coffee. Over time, coffee oils, mineral deposits, and residue can build up, affecting the flavor of your brew and the efficiency of the machine. Here’s a step-by-step guide to help you clean your coffee maker effectively.

Supplies You’ll Need

  • White vinegar: A natural cleaner that removes mineral deposits and odors.
  • Water: For rinsing and cleaning.
  • Dish soap: For cleaning removable parts.
  • Soft cloth or sponge: For wiping surfaces.
  • Baking soda: For stubborn stains and odors (optional).
  • Coffee filter: For the brewing process during cleaning.

Step-by-Step Instructions

Step 1: Gather Your Supplies

Before you start cleaning, gather all necessary supplies so you have everything on hand.

Step 2: Clean Removable Parts

  1. Unplug the Coffee Maker: Ensure the coffee maker is turned off and unplugged for safety.
  2. Remove Parts: Take out any removable parts, such as the carafe, filter basket, and any permanent filters.
  3. Wash with Soap: Wash these parts in warm, soapy water. Use a soft sponge to scrub away any coffee stains or oils. Rinse thoroughly and let them dry.

Step 3: Prepare the Cleaning Solution

  1. Vinegar and Water Mixture: Mix equal parts of white vinegar and water in the coffee maker’s reservoir. A common ratio is 1 part vinegar to 1 part water (about 2 cups each).
  2. Optional Baking Soda Boost: For added cleaning power, you can mix in a tablespoon of baking soda. This helps to combat stubborn stains and odors.

Step 4: Run the Coffee Maker

  1. Start the Brewing Cycle: Place the carafe back in position and start a brewing cycle with the vinegar solution. This will help clean the internal components.
  2. Pause and Wait: If your coffee maker has a pause feature, pause the brew halfway through for about 30 minutes. This allows the vinegar solution to work on stubborn deposits.
  3. Complete the Cycle: After waiting, resume the brewing process and allow the coffee maker to finish the cycle.

Step 5: Rinse the Coffee Maker

  1. Empty the Carafe: Once the cycle is complete, discard the vinegar solution.
  2. Rinse with Water: Fill the reservoir with clean water and run another brewing cycle to rinse out any remaining vinegar. You may need to do this 2-3 times to ensure all vinegar flavor is gone.

Step 6: Clean the Exterior

  1. Wipe Down the Exterior: Use a damp cloth or sponge with a bit of dish soap to clean the exterior of the coffee maker. Avoid abrasive cleaners that can scratch the surface.
  2. Dry Thoroughly: Wipe down the exterior with a dry cloth to prevent any moisture buildup.

Maintenance Tips

  • Regular Cleaning Schedule: Clean your coffee maker every month or every 30 brews to prevent buildup and maintain optimal performance.
  • Use Filtered Water: Using filtered water can reduce mineral buildup in your coffee maker.
  • Avoid Leaving Coffee in the Carafe: Do not leave brewed coffee in the carafe for extended periods, as this can cause staining and affect the flavor of future brews.
  • Descale as Needed: If you notice a slow brewing process or strange tastes, it may be time to descale your machine more frequently.

Conclusion

Cleaning your coffee maker is a simple but essential task to ensure you enjoy delicious coffee every time. Regular maintenance not only improves the flavor of your brew but also extends the life of your coffee maker. By following these steps, you can keep your coffee maker in excellent condition and enjoy fresh, great-tasting coffee.

Takeaway Tips

  • Clean monthly to prevent buildup and ensure great-tasting coffee.
  • Use vinegar to remove mineral deposits and odors effectively.
  • Rinse thoroughly after cleaning to eliminate any leftover vinegar taste.
  • Wipe down the exterior regularly to maintain its appearance.