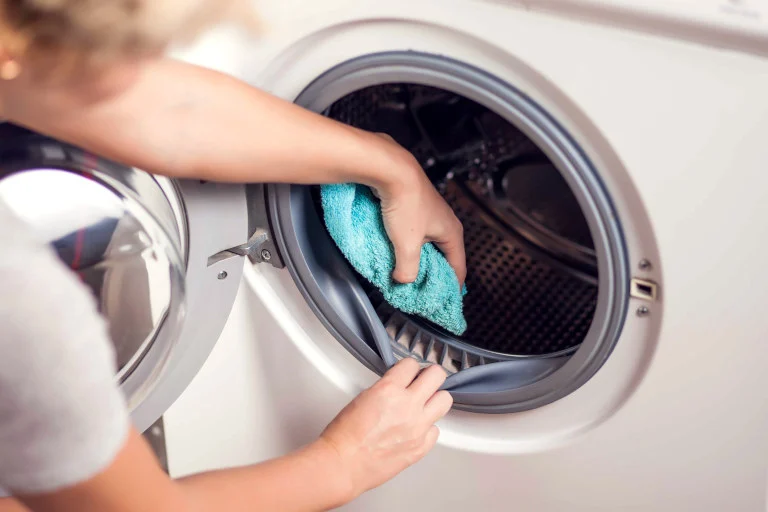
How to Clean Your Washing Machine Properly (With Household Products)

Want to know how to clean your washing machine the right way? Keeping your appliance clean is essential for hygienic laundry and long-term performance. Over time, detergent residue, fabric softener, and dirt can build up in hidden parts of your washing machine, causing unpleasant odours and lowering efficiency.

In this guide, you’ll learn how to clean every part of your washing machine using simple, effective household items like vinegar and baking soda. Whether you’re doing regular maintenance or tackling built-up grime, we’ve got you covered.

Why You Should Clean Your Washing Machine

Many assume washing machines clean themselves while in use. In reality, regular maintenance is key to preventing issues such as:

  • Musty odours from mould and mildew
  • Poor cleaning results from detergent buildup
  • Shortened appliance lifespan
  • Clogged filters and drainage problems

By cleaning your machine monthly or every few months (depending on usage), you’ll ensure fresh-smelling laundry and optimal performance.

How Often Should You Clean It?

Here are some basic guidelines:

  • Light use (1-2 washes/week): Every 3 months
  • Moderate use (3-5 washes/week): Every 2 months
  • Heavy use (daily): Monthly

If you notice odours, detergent residue, or poor wash performance, it’s time to give it a clean.

Step-by-Step: How to Clean a Washing Machine

1. Clean the Detergent Drawer

Remove the drawer and soak it in warm, soapy water. Use an old toothbrush to scrub away residue, especially in corners. Dry and return the drawer.

2. Clean the Filter

Usually located at the bottom front panel, the filter catches coins, lint, and small items. Place a towel and shallow container underneath before opening it. Remove debris, rinse under water, and reinstall it securely.

3. Clean the Drum

Pour 1 cup of white vinegar directly into the drum and run the hottest wash cycle (empty, no laundry). This helps dissolve limescale, kill bacteria, and remove odours.

4. Add Baking Soda for Extra Freshness

After the vinegar cycle, sprinkle half a cup of baking soda into the drum and run another hot cycle. This boosts freshness and helps neutralise any lingering odours.

5. Clean the Door Seal

Wipe the rubber seal using a cloth soaked in vinegar or mild detergent. Gently pull back the folds to remove hidden debris, hair, or mould.

6. Clean the Exterior

Use a damp microfiber cloth with a little dish soap to wipe down the exterior, control panel, and door. Avoid spraying directly into buttons or vents.

Extra Tips to Keep It Fresh

  • Leave the door open after each wash to allow ventilation
  • Avoid overloading the machine
  • Use the right amount of detergent (check your manual)
  • Run a monthly hot wash with vinegar if no self-clean cycle exists

Can You Use Store-Bought Cleaners?

Yes, there are many washing machine cleaning tablets or liquids available. These are effective, but vinegar and baking soda are excellent eco-friendly alternatives that save money.

When to Call a Professional?

If your washing machine has a persistent smell, won’t drain, or you’re unsure how to remove internal parts like filters, it’s best to book a professional appliance cleaning.

Need help? At Shining Oven, we offer deep appliance cleaning services that ensure your washing machine looks and functions like new.

Final Thoughts

Cleaning your washing machine isn’t difficult—and it makes a noticeable difference in both cleanliness and energy efficiency. With just a few household items and 30 minutes of effort, you can extend the life of your appliance and enjoy fresher laundry.

Ready for a deeper clean?

Book a service with Shining Oven or contact us for more appliance cleaning solutions.

After Builders Cleaning in Ireland: Full Guide 2025

Renovations and construction work breathe new life into a space—but they also leave behind dust, debris, and post-build chaos. That’s where after builders cleaning comes in. Whether you’ve upgraded a kitchen, completed an extension, or refurbished an entire property, professional after builders cleaning ensures your home or workplace is safe, spotless, and truly ready to enjoy.

In this guide, we’ll break down what after builders cleaning includes, why it matters, and how much you can expect to pay in Ireland. If you’re wondering whether this service is worth it—the short answer is yes.

What Is After Builders Cleaning?

After builders cleaning (also known as post-construction cleaning) is a specialised, deep cleaning service designed to remove all traces of building work. It focuses on eliminating construction dust, paint splashes, adhesives, plaster residue, and leftover materials that regular cleaning doesn’t tackle.

This service is ideal for:

  • Homeowners after renovations or extensions
  • Landlords preparing properties for new tenants
  • Businesses finishing fit-outs or refurbishments
  • Property developers post-handover

Unlike general cleaning, this service targets both visible mess and hidden contaminants, ensuring your space is truly move-in ready.

What’s Included in an After Builders Cleaning Service?

While offerings vary by provider, a comprehensive after builders clean typically includes:

1. Surface Dust & Debris Removal

  • Vacuuming fine dust from all floors, carpets, walls, and ceilings
  • Dusting shelves, skirting boards, door frames, radiators
  • Wiping furniture, worktops, and fittings

2. Paint & Plaster Cleanup

  • Scraping dried paint drops and plaster off windows, sills, and tiles
  • Cleaning excess sealants or adhesives from fixtures

3. Detailed Kitchen & Bathroom Cleaning

  • Removing dust from inside/outside cabinets and drawers
  • Sanitising sinks, taps, and tiles
  • Descaling bathroom fittings

4. Window & Glass Cleaning

  • Interior window washing
  • Cleaning window frames, mirrors, and any glass surfaces

5. Floor Polishing & Mopping

  • Sweeping construction debris
  • Mopping tiles, vinyl, or wooden floors
  • Polishing where necessary

6. Final Touches

  • Removal of labels or stickers on new appliances
  • Disposal of packaging and protective coverings
  • Cleaning behind and under appliances

Add-on options often include carpet shampooing, oven cleaning, external power washing, or air duct cleaning.

Why Is After Builders Cleaning So Important?

Health & Safety

Construction dust can contain harmful particles that impact air quality and cause respiratory irritation. Sharp debris or tools left behind also pose safety risks. A professional clean ensures every surface is safe for your family, staff, or tenants.

Time & Stress Savings

Post-build cleaning can take hours or even days when done alone—and it’s tough work. Hiring pros saves your time, ensures efficiency, and delivers better results.

Better Presentation

Whether you’re selling, renting, or simply returning to a freshly renovated space, a thorough clean enhances the property’s appearance and value.

How Much Does After Builders Cleaning Cost in Ireland?

Prices vary depending on your property’s size, location, and the amount of post-build mess. Here’s a rough guide:

  • Studio / 1-Bed Apartment: €220–€270
  • 2-Bed Property: €280–€330
  • 3-Bed House: €350–€410
  • 4-Bed House: €410–€450
  • 5-Bed House: €470–€530+

Extras like oven cleaning, external areas, and carpet shampooing will increase the overall cost, but bundling services can help you save.

When Should You Book After Builders Cleaning?

  • Right after renovation work finishes
  • Before property handover or tenant move-in
  • Before listing your home on the market
  • Before opening a refurbished business space

To ensure the best results, schedule your clean after all construction tools and workers have left the premises.

Why Choose Shining Oven for After Builders Cleaning?

We understand the specific challenges of post-construction cleaning—and we know how to handle them. At Shining Oven, we offer:

  • Fully trained and insured professionals
  • All tools and eco-friendly products provided
  • Flexible booking slots, including weekends
  • Transparent pricing and free quotes
  • Service coverage across Dublin, Kildare, Meath, and surrounding areas

With years of experience and hundreds of happy clients, we deliver results that speak for themselves.

Final Thoughts

After builders cleaning is not a luxury—it’s a necessary step to restore safety, cleanliness, and comfort after construction work. With expert cleaners handling the dirt and dust, you can move back into your refreshed space without lifting a finger.

Want a fresh start after your renovation? Book your after builders cleaning with Shining Oven today and enjoy a spotless finish, guaranteed.

Request a Free Quote or Book Online in just a few clicks.

How Much Does Deep Cleaning Cost in Ireland? (2025)

Thinking about getting a deep clean for your home but not sure how much it will cost? You’re not alone. Many homeowners across Ireland ask the same question. Whether you’re preparing for guests, moving in or out, or just want that fresh-start feeling, knowing what to expect from deep cleaning services can help you make a smart choice.

In this guide, we’ll explore what’s included in a deep clean, average price ranges, key factors that impact the cost, and how to get the best value when hiring professionals in Ireland.

What is Deep Cleaning and Why It Matters

Deep cleaning goes beyond your typical tidy-up. It targets the hidden dirt, grime, and buildup that accumulates over time — especially in kitchens, bathrooms, and other high-use areas. Unlike standard cleaning, deep cleaning involves attention to details such as inside cabinets, behind appliances, light switches, tile grout, and more.

Whether you’re booking a one-time service or want to schedule recurring seasonal deep cleans, this level of cleaning helps:

  • Improve indoor air quality
  • Reduce allergens and bacteria
  • Refresh your entire home for peace of mind

What’s Typically Included in a Deep Clean?

Every company offers slightly different packages, but here’s what’s commonly included in a deep cleaning service:

  • Complete surface dusting, including skirting boards and door frames
  • Internal window and mirror cleaning
  • Full kitchen cleaning: countertops, cabinet fronts, sinks, and appliances
  • Deep bathroom cleaning: toilet, shower, bathtub, sink, tiles
  • Floor vacuuming and mopping throughout the home
  • Cobweb removal and bin emptying

Additional services like oven cleaning, carpet shampooing, or post-renovation cleaning may be added depending on your needs.

Deep Cleaning Cost in Ireland: Price Breakdown by Property Type

The deep cleaning cost in Ireland can vary depending on the size of your home, the type of cleaning required, and any optional extras. Below are general price estimates:

  • Studio Apartment: €220–€240
  • 1-Bedroom Apartment: €250–€270
  • 2-Bedroom Apartment: €275–€295
  • 3-Bedroom House: €350–€410
  • 4-Bedroom House: €410–€450
  • 5-Bedroom House: €470–€530

Remember, these are ballpark figures. The final quote will depend on factors like the property’s current condition, accessibility, and whether extra services are included.

Key Factors That Affect Deep Cleaning Prices

1. Size of the Property

Larger homes take more time and resources to clean thoroughly. A 5-bedroom house will naturally cost more than a studio apartment.

2. Cleaning Frequency

Recurring cleaning customers may get discounted rates. One-off deep cleans tend to cost more due to the time involved.

3. Level of Dirt or Neglect

A home that hasn’t been professionally cleaned in months — or has recently undergone renovations — will require more intensive effort.

4. Add-On Services

Services like oven cleaning, fridge interior cleaning, window exteriors, or carpet shampooing are usually charged separately.

How Often Should You Schedule a Deep Clean?

There’s no one-size-fits-all answer, but most homeowners in Ireland opt for a deep clean:

  • Every 3 to 6 months for regular home maintenance
  • After renovations or construction work
  • Before moving into a new home or listing a property for sale
  • When hosting guests, family gatherings, or holidays

How to Save Money on Deep Cleaning Services

Looking to keep your home spotless without overspending? Here are a few tips:

  • Book during weekdays or quieter times (avoid weekends)
  • Ask about package discounts when bundling oven or carpet cleaning
  • Compare quotes and read reviews before booking
  • Look for special offers, coupons, or loyalty programs

Why Choose Shining Oven?

At Shining Oven, we provide more than just surface-level cleaning. Our experienced and fully insured team delivers thorough, reliable results with transparent pricing and flexible scheduling options. Whether you’re in Dublin, Kildare, Meath, or surrounding areas, we tailor our services to suit your space, timeline, and budget.

Our promise:

  • Vetted, friendly, and experienced cleaners
  • No hidden costs or surprise fees
  • Eco-friendly cleaning products available
  • Fast, flexible booking with same-day availability in select areas

Is Deep Cleaning Worth It?

Absolutely. Deep cleaning provides long-term value by creating a healthier, more comfortable home environment. With average deep cleaning cost in Ireland ranging from €220 to €470, it’s a worthwhile investment that saves you time, effort, and future stress.

Ready to Book Your Deep Clean?

Visit our booking page or contact us to request a free quote. Our team is here to help you choose the right service for your needs.

Need additional services like oven or carpet cleaning? Let us know — we offer bundle deals for even more value.

How to Clean Oven?

An electric oven is one of the most essential appliances in any kitchen. But just like any other kitchen equipment, it needs regular maintenance to keep it working efficiently. A particularly important part of the oven is the grill element, which is typically located at the ceiling of the oven. Cleaning this component is crucial to avoid unpleasant smoke during cooking, which can result in poor food quality and an overall frustrating cooking experience. In this article, we’ll guide you through how to clean your electric oven grill effectively, how to maintain it for the future, and even share some tips on how to prevent it from getting dirty in the first place.

Why Should You Clean the Oven Grill?

Over time, grease, food particles, and other debris can accumulate on the grill element. If not cleaned properly, this buildup can lead to unwanted smoke during cooking. That smoke can be caused by the fat burning as it heats up, which can lead to a less than optimal cooking experience. By cleaning the oven grill regularly, you not only improve the performance of your oven but also reduce the risk of smoke, poor food quality, and even potential fire hazards. In this post, we will walk you through easy and effective methods for cleaning your electric oven grill, while ensuring that no damage is caused to the appliance.

Things to Remember Before You Clean the Grill Element

Before you start the cleaning process, here are a few important tips to keep in mind to avoid damaging your oven:

  1. Avoid Scraping Aggressively: Don’t scrape or scrub the grill element too aggressively. Doing so can cause the surface to get damaged and even affect its functionality.

  2. Choose the Right Cleaning Products: Ensure that any cleaning agents or detergents you use are non-flammable and suitable for high-heat appliances. Harsh chemicals or those containing flammable substances can pose a serious fire risk.

  3. Dry the Grill After Cleaning: After cleaning the grill, it’s essential to ensure that all moisture is completely evaporated before using it. A good practice is to run the grill element on its own for a few minutes to help dry it out.

How to Clean Your Electric Oven Grill: Step-by-Step

Method 1: Easy Oven Grill Cleaning

Here’s a simple method for cleaning the grill element of your oven:

  1. Preheat the Oven: Turn on your oven and set the temperature to around 80°C to 120°C (176°F to 248°F). Let the grill element heat up for about 10 minutes until it begins to glow red. You’ll likely see some smoke coming out, which is perfectly normal and a sign that accumulated grease and food residue is being loosened.

  2. Ventilate the Room: Make sure you turn on your kitchen’s extractor fan and open any nearby windows. You might also want to close doors leading to other rooms to prevent the smoke from spreading through the house.

  3. Unplug the Oven: Once the oven has heated up and smoked a little, turn it off and unplug it. Let the oven cool down.

  4. Clean the Grill: After the oven has cooled, take a damp cloth and spray some oven-safe cleaner or detergent onto the grill element. Gently wipe it down to remove the grease and food particles. You should be able to easily clean the front part of the grill.

  5. Repeat if Needed: If the back of the grill element is still dirty, you might need to repeat the procedure. Keep in mind that the back is harder to access, so the cleaning might not be as thorough.

This method is great for cleaning the grill element’s surface, and most grease buildup will be loosened up. However, it may not be enough if you’re looking to do a deep clean, so don’t hesitate to repeat the process if necessary.

Method 2: Disassembling the Grill Element

For those who are comfortable with more intensive cleaning, you can opt to remove the grill element for a thorough clean:

  1. Turn Off and Unplug the Oven: Ensure the oven is completely turned off and unplugged before attempting to remove any components.

  2. Remove the Grill Element: You’ll need to carefully unscrew or detach the grill element from the oven. This may require removing wires, so be cautious and ensure you have proper tools.

  3. Soak and Clean: Soak the grill element in a suitable cleaning solution or detergent for a while. After soaking, use a soft cloth or sponge to gently scrub away any remaining grease or debris.

  4. Reinstall the Grill Element: Once cleaned, reattach the grill element, making sure it’s properly installed to avoid any issues with oven performance.

Note: This method should only be performed by those comfortable with appliance disassembly. If the grill element isn’t reinstalled correctly, it could lead to malfunctioning or voiding your oven’s warranty.

How to Keep Your Oven Clean

Keeping your oven clean doesn’t have to be a hassle. Here are some tips to minimize the amount of cleaning required:

  1. Cook at a Lower Temperature: Cooking at temperatures above 180°C (356°F) can cause oil splashes and grease buildup, especially on the grill element. Cooking at a slightly lower temperature can help reduce this.

  2. Avoid Overfilling Pans and Trays: Don’t overfill your pans or trays with liquid. Boiling over can cause spills and create extra messes inside the oven.

  3. Regular Cleaning: A quick wipe-down after each use can save you a lot of time and effort in the long run. Cleaning your oven once a week will help keep it in pristine condition.

Why Is Oven Maintenance Important?

Maintaining a clean oven is more than just an aesthetic concern; it has practical benefits as well:

  • Tastier Meals: A clean oven ensures better heat distribution, which results in evenly cooked, tastier meals.

  • Improved Cooking Experience: A smoke-free and well-maintained oven enhances the overall cooking experience.

  • Increased Oven Lifespan: Regular cleaning can extend the lifespan of your oven and help avoid costly repairs.

  • Reduced Fire Hazards: A clean oven reduces the risk of overheating, smoke, and potential fire hazards.

Skip the Hassle: Hire a Professional Oven Cleaner

If you’re too busy to clean your oven, you can always hire a professional oven cleaner. Services like oven cleaning offer expert cleaning, where they disassemble and clean every part of the oven, ensuring it’s spotless and safe for use.

Professional cleaners use specialized tools and strong detergents to clean every corner of your oven, then reassemble the appliance and run tests to make sure it’s working perfectly. In just 2 to 4 hours, you can have your oven looking as good as new.

Conclusion

Cleaning your electric oven grill doesn’t have to be difficult. With the right tools, cleaning products, and a bit of patience, you can maintain your oven in excellent condition. Not only will your oven perform better, but you’ll also avoid unpleasant odors and smoke while cooking. Regular cleaning and maintenance ensure that your oven lasts longer and keeps providing the quality results you expect every time. So, keep your oven clean, and it will reward you with tasty meals and a smoother cooking experience.

Happy cooking!

How to Clean the Inside of a Toaster?

Cleaning the inside of your toaster is essential for maintaining its performance and preventing the buildup of crumbs and grease, which can lead to unpleasant odors or even fire hazards. Here’s a detailed guide on how to safely clean your toaster without damaging it.

Step 1: Unplug the Toaster

Before you begin cleaning, unplug the toaster from the wall outlet. This ensures your safety and prevents any accidental activation while you’re cleaning.

Step 2: Remove Crumb Tray

Most toasters have a removable crumb tray located at the bottom. Here’s how to clean it:

  1. Locate the Crumb Tray: Check the bottom of your toaster for the crumb tray. It may slide out or be attached with a latch.
  2. Empty the Tray: Pull the tray out gently and empty any crumbs into the trash.
  3. Wash the Tray: Clean the tray with warm, soapy water. Use a sponge or dishcloth to scrub away any grease or residue. Rinse it thoroughly and let it dry completely before reattaching it to the toaster.

Step 3: Shake Out Loose Crumbs

To clean the inside of the toaster, you need to remove any loose crumbs.

  1. Turn the Toaster Upside Down: With the toaster unplugged, carefully turn it upside down over a clean surface or a sink.
  2. Shake Gently: Gently shake the toaster to dislodge any remaining crumbs. Be cautious not to shake too hard to avoid damaging any internal components.

Step 4: Clean the Interior

Now that you’ve removed the crumbs, it’s time to clean the interior surfaces.

For Light Cleaning:

  1. Dampen a Cloth: Take a soft, damp cloth (not soaking) and wipe the interior surfaces of the toaster. Avoid using any harsh chemicals or abrasives.
  2. Remove Stains: If there are stubborn stains or residue, use a mixture of water and a mild dish soap on the cloth to scrub gently.
  3. Avoid the Heating Elements: Be careful not to get water on the heating elements or any electrical parts inside the toaster.

For Deeper Cleaning:

  1. Use a Toothbrush: For harder-to-reach areas, you can use a soft-bristle toothbrush or a paintbrush to gently scrub away any crumbs or debris.
  2. Dampen with Vinegar: If there are tough stains, you can lightly dampen a cloth with white vinegar and gently wipe the stained areas.

Step 5: Clean the Exterior

Don’t forget to clean the exterior of the toaster to remove fingerprints and smudges.

  1. Wipe Down the Surface: Use a damp cloth to wipe the exterior of the toaster. For stainless steel surfaces, a mixture of vinegar and water can help restore shine.
  2. Dry Thoroughly: Ensure that you dry the exterior with a clean towel.

Step 6: Reassemble the Toaster

Once everything is clean and dry:

  1. Replace the Crumb Tray: Slide the crumb tray back into place.
  2. Plug the Toaster Back In: Once you’re sure everything is dry, plug the toaster back into the outlet.

Step 7: Regular Maintenance

To keep your toaster in good condition, consider these tips:

  • Clean Regularly: Aim to clean the crumb tray weekly and perform a deeper clean monthly.
  • Avoid Overloading: Don’t overload your toaster with too much bread or other items, as this can cause crumbs to build up faster.
  • Monitor for Odors: If you notice any burnt smells while using the toaster, it may indicate that it’s time for a thorough cleaning.

Conclusion

Cleaning the inside of your toaster is a simple yet essential task that helps maintain its performance and safety. By following these steps, you can keep your toaster clean and in good working order, ensuring that it continues to toast your bread perfectly for years to come.

How to Remove Crayon from Wall Without Removing Paint?

Finding crayon marks on your walls can be frustrating, especially if you want to remove them without damaging the paint. Fortunately, there are several effective methods to get rid of crayon marks safely. This guide will provide you with step-by-step instructions to restore your walls to their original condition.

Step 1: Gather Your Supplies

Before you start, gather the following supplies:

  • Soft cloths or paper towels
  • Baking soda
  • Vinegar
  • Baby oil or mineral oil
  • Toothpaste (non-gel)
  • Melamine foam (Magic Eraser)
  • Warm soapy water
  • Spray bottle (optional)

Step 2: Test a Small Area

Before applying any cleaning solution to the crayon marks, test it on a small, inconspicuous area of the wall to ensure it doesn’t damage the paint.

Step 3: Use Baking Soda and Water

Baking soda is a gentle abrasive that can effectively remove crayon marks without harming the paint.

  1. Make a Paste: Mix equal parts baking soda and water to create a thick paste.
  2. Apply the Paste: Use a soft cloth or your fingers to apply the paste directly to the crayon marks.
  3. Gently Rub: Lightly rub the area in circular motions until the crayon begins to lift.
  4. Wipe Clean: Use a damp cloth to wipe away the baking soda paste and crayon residue.
  5. Dry the Area: Pat the area dry with a clean towel.

Step 4: Try Vinegar

Vinegar is an excellent natural cleaner that can help dissolve crayon wax.

  1. Prepare the Vinegar Solution: Mix equal parts white vinegar and water in a spray bottle.
  2. Spray the Area: Lightly spray the crayon marks with the vinegar solution. Avoid soaking the wall.
  3. Let It Sit: Allow the solution to sit for about 5 minutes to penetrate the crayon.
  4. Wipe Away: Use a soft cloth or sponge to gently wipe the area clean.
  5. Rinse with Water: Wipe the area with a damp cloth to remove any vinegar residue, then pat dry.

Step 5: Use Baby Oil or Mineral Oil

Baby oil or mineral oil can effectively break down the wax in crayon.

  1. Apply the Oil: Put a small amount of baby oil or mineral oil on a soft cloth.
  2. Rub the Crayon Marks: Gently rub the cloth on the crayon marks in a circular motion.
  3. Wipe Clean: After the crayon lifts, use a damp cloth to wipe away the oil and crayon residue.
  4. Dry the Area: Use a clean towel to pat the area dry.

Step 6: Toothpaste Method

Toothpaste (not gel) can also be effective in removing crayon stains.

  1. Apply Toothpaste: Put a small amount of non-gel toothpaste on a soft cloth.
  2. Rub the Stain: Gently rub the crayon mark with the cloth in a circular motion.
  3. Wipe Away: Use a damp cloth to wipe off the toothpaste and any crayon residue.
  4. Dry the Area: Pat the area dry with a clean towel.

Step 7: Use a Magic Eraser

Melamine foam, commonly known as a Magic Eraser, can be effective for tougher crayon marks.

  1. Dampen the Eraser: Lightly dampen a Magic Eraser with water (do not soak).
  2. Gently Rub: Lightly rub the crayon marks with the eraser, applying minimal pressure to avoid damaging the paint.
  3. Wipe Clean: After removing the crayon, use a damp cloth to wipe the area clean.
  4. Dry the Area: Pat the area dry with a clean towel.

Step 8: Final Touch-Up

If any faint marks remain after cleaning, consider using touch-up paint that matches your wall color.

  1. Check for Residue: Ensure the area is clean and dry before applying touch-up paint.
  2. Apply Touch-Up Paint: Use a small brush to carefully apply the paint to the affected area, blending it in with the surrounding wall.

Conclusion

Removing crayon marks from your walls doesn’t have to be a daunting task. With these natural and gentle cleaning methods, you can effectively eliminate crayon stains without damaging your paint. Regularly checking your walls and addressing any marks promptly can help keep your home looking clean and fresh.

How to Get Rid of Urine Smell in Bathroom?

Urine odors in the bathroom can be unpleasant and persistent, making it essential to address the source of the smell effectively. Whether it’s due to pets, kids, or an adult accident, removing the urine smell requires a thorough cleaning and the right approach. Here’s a comprehensive guide to help you eliminate urine odors from your bathroom.

Step 1: Identify the Source

Before you can eliminate the smell, identify where the urine odor is strongest. Common areas include:

  • Around the Toilet: Check for spills or splashes around the base.
  • Bathroom Rugs: These can absorb moisture and odors.
  • Walls and Floors: Especially in corners or areas where cleaning might be neglected.
  • Trash Bins: If you have a trash can in the bathroom, check for any soiled items.

Step 2: Gather Your Supplies

You will need the following cleaning supplies:

  • White vinegar
  • Baking soda
  • Hydrogen peroxide
  • Liquid dish soap
  • Spray bottles
  • Clean cloths or paper towels
  • A scrub brush or old toothbrush
  • An enzymatic cleaner (optional, especially for pet stains)

Step 3: Clean the Affected Areas

For Hard Surfaces (Toilet, Walls, Floors):

  1. Vinegar Solution: Mix equal parts of white vinegar and water in a spray bottle. Spray the solution on the affected areas and let it sit for about 10-15 minutes. This will help neutralize odors.
  2. Scrub: After letting the vinegar solution sit, use a scrub brush or old toothbrush to scrub the area gently, focusing on any stains or discoloration.
  3. Rinse: Wipe down with a clean cloth dampened with water to remove the vinegar residue.

For Soft Surfaces (Rugs, Mats, Upholstery):

  1. Baking Soda: Sprinkle baking soda generously over the affected area. Baking soda is excellent at absorbing odors.
  2. Let It Sit: Allow the baking soda to sit for at least 15-30 minutes, or longer if the smell is particularly strong.
  3. Vacuum: After letting it sit, vacuum up the baking soda. If the odor persists, repeat the process.

Step 4: Use an Enzymatic Cleaner (For Stubborn Odors)

If the urine smell persists, especially from pet accidents, consider using an enzymatic cleaner designed specifically for pet stains. These cleaners break down the proteins in urine that cause odors.

  1. Apply the Cleaner: Follow the manufacturer’s instructions to apply the enzymatic cleaner to the affected area.
  2. Let It Sit: Allow the cleaner to sit for the recommended amount of time so it can penetrate and break down the stain.
  3. Blot and Rinse: Blot the area with a clean cloth to absorb excess moisture, then rinse with water.

Step 5: Maintain a Fresh Bathroom

Once you’ve eliminated the urine smell, consider implementing these preventive measures:

  • Regular Cleaning: Establish a cleaning routine for your bathroom, including wiping down surfaces and mopping the floor weekly.
  • Use Air Fresheners: Keep a natural air freshener, such as essential oils or potpourri, to help mask any lingering odors.
  • Improve Ventilation: Use an exhaust fan or open a window to improve airflow, reducing humidity and odors in the bathroom.

Additional Tips:

  • Check the Toilet: Sometimes, odors may come from the toilet itself. Ensure the toilet is clean and functioning properly.
  • Clean Grout and Tiles: If you have tiles or grout that have absorbed odors, consider scrubbing them with a mixture of baking soda and hydrogen peroxide.
  • Keep a Clean Trash Bin: Regularly empty and clean your bathroom trash bin to prevent odors from accumulating.

Conclusion

Getting rid of urine smell in the bathroom requires a thorough cleaning approach and consistent maintenance. By identifying the source, using the right cleaning solutions, and implementing preventive measures, you can create a fresh and pleasant bathroom environment.

How to Get Rid of Musty Smell in House Naturally?

A musty smell in your home can be unpleasant and often indicates the presence of mold, mildew, or poor ventilation. Fortunately, you can eliminate these odors naturally using various methods. This guide will walk you through steps to identify the source of the musty smell and provide effective, natural solutions to help you breathe easier in your home.

Step 1: Identify the Source of the Smell

Before you can effectively eliminate the musty odor, it’s crucial to identify its source. Common causes include:

  • Mold and Mildew: Often found in damp areas like basements, bathrooms, and kitchens.
  • Poor Ventilation: Lack of airflow can trap moisture and odors.
  • Water Damage: Leaks from pipes, roofs, or windows can lead to musty smells.
  • Old Carpets or Upholstery: These can absorb moisture and odors over time.

Step 2: Improve Air Circulation

Improving ventilation in your home can significantly reduce musty odors.

  • Open Windows: On dry days, open windows to allow fresh air to circulate throughout your home.
  • Use Fans: Ceiling fans and portable fans can help increase airflow, especially in rooms prone to dampness.
  • Install Air Purifiers: Consider using an air purifier with a HEPA filter to remove airborne particles and improve air quality.

Step 3: Clean Affected Areas

Once you’ve identified areas where the musty smell is strongest, it’s time to clean them thoroughly.

For Mold and Mildew:

  • Natural Cleaning Solution: Mix equal parts of white vinegar and water in a spray bottle. Spray the affected areas and let it sit for 10-15 minutes before wiping clean with a damp cloth.
  • Baking Soda: Sprinkle baking soda on areas affected by mold or mildew, let it sit for a few hours, and then vacuum it up. Baking soda absorbs odors effectively.

For Carpets and Upholstery:

  • Steam Cleaning: If your carpets or upholstery smell musty, consider steam cleaning them to eliminate odors. You can rent a steam cleaner or hire a professional service.
  • Vinegar Solution: Mix one cup of white vinegar with one cup of water and spray lightly on the carpet or upholstery. Allow it to dry completely before vacuuming.

Step 4: Absorb Odors Naturally

Natural odor absorbers can help eliminate musty smells without using harsh chemicals.

  • Baking Soda: Place open containers of baking soda in various rooms to absorb odors. You can also sprinkle it on carpets, let it sit for a few hours, and then vacuum it up.
  • Activated Charcoal: Similar to baking soda, activated charcoal is effective at absorbing odors. Place bowls of activated charcoal in areas where the musty smell is prevalent.
  • Essential Oils: Use a diffuser with essential oils like tea tree oil, lavender, or eucalyptus, which not only add a pleasant scent but also have antifungal properties.

Step 5: Maintain a Dry Environment

Preventing moisture buildup is key to eliminating musty smells.

  • Dehumidifiers: Consider using a dehumidifier in damp areas like basements or bathrooms to reduce humidity levels.
  • Fix Leaks: Repair any leaks in pipes, roofs, or windows promptly to prevent moisture accumulation.
  • Use Exhaust Fans: Turn on exhaust fans while cooking or showering to reduce humidity and improve ventilation.

Step 6: Regular Cleaning Routine

Establishing a regular cleaning routine can help keep your home fresh and free from musty odors.

  • Dust Regularly: Dust accumulates moisture and can contribute to musty smells. Dust surfaces regularly using a damp cloth.
  • Wash Fabrics: Wash curtains, cushion covers, and other fabric items regularly to prevent the buildup of odors.
  • Clean and Change Air Filters: Regularly clean or replace HVAC filters to improve air quality and reduce mustiness.

Conclusion

Getting rid of a musty smell in your house naturally requires a combination of identifying the source, improving ventilation, and using natural cleaning methods. By following these steps, you can create a fresher, healthier living environment for you and your family.

How to Get Dried Red Nail Polish Out of Carpet?

Accidental spills of red nail polish on carpet can be a frustrating experience, especially when the polish dries. Fortunately, with the right approach, you can effectively remove the stain without damaging your carpet. Follow this step-by-step guide to tackle dried red nail polish stains.

Step 1: Act Quickly (If Possible)

If you discover the stain while the nail polish is still wet, act immediately to absorb as much as possible.

  • Blot the Stain: Use a clean cloth or paper towel to blot the wet nail polish. Avoid rubbing, as this can spread the stain.

Step 2: Scrape Away Dried Polish

If the nail polish has dried, you need to remove the hardened layer first.

  • Use a Spoon or Plastic Knife: Gently scrape the dried nail polish with a spoon or a plastic knife to lift as much of it as possible without damaging the carpet fibers. Be cautious not to press too hard, as this can damage the carpet.

Step 3: Test a Cleaning Solution

Before applying any cleaning solution, test it on an inconspicuous area of the carpet to ensure it won’t cause discoloration.

Recommended Cleaning Solutions:

  • Acetone (Nail Polish Remover): This is effective for removing nail polish but can also discolor some carpets.
  • Rubbing Alcohol: A less aggressive alternative that can also work well for nail polish stains.
  • Commercial Carpet Cleaner: Specifically designed for tough stains, but ensure it’s safe for your carpet type.

Step 4: Apply the Cleaning Solution

Once you’ve tested the cleaning solution, follow these steps:

  • Dampen a Clean Cloth: Use a cloth to apply a small amount of your chosen cleaning solution directly onto the stain.
  • Blot the Area: Gently blot the stained area, starting from the outside and moving inward. Use a fresh part of the cloth as it absorbs the polish. Do not saturate the carpet; a little goes a long way.
  • Repeat: Continue blotting until the nail polish begins to lift.

Step 5: Rinse the Area

After removing the stain, it’s important to rinse the area to eliminate any remaining cleaning solution.

  • Use Clean Water: Dampen a clean cloth with cold water and blot the area to remove any residue from the cleaning solution.
  • Blot Dry: Use a dry towel to absorb as much moisture as possible.

Step 6: Check for Residual Stains

After the area has dried, check for any remaining stains. If necessary, repeat the cleaning process until the stain is completely removed.

Step 7: Final Clean-Up

To further clean the area and eliminate any lingering odors:

  • Baking Soda: Sprinkle baking soda over the spot to absorb odors. Let it sit for several hours or overnight.
  • Vacuum: Vacuum up the baking soda after it has had time to work.

Additional Tips:

  • Avoid Heat: Do not use heat or steam cleaners on the stained area, as heat can set the stain.
  • Use Cold Water: When rinsing, always use cold water, as hot water can make the stain more difficult to remove.
  • Professional Help: If the stain persists after several attempts, consider seeking professional carpet cleaning services.

Conclusion

Removing dried red nail polish from carpet can be a challenging task, but with prompt action and the right techniques, you can restore your carpet to its original condition. By following these steps, you can effectively tackle the stain and maintain a clean home.

How to Get Cat Pee Out of Carpet?

Dealing with cat urine on the carpet can be a frustrating experience, but acting quickly and using the right methods can help you remove the stain and eliminate the odor. Follow this step-by-step guide to effectively clean cat pee from your carpet and keep your home smelling fresh.

Step 1: Blot Up the Urine

The first and most crucial step is to absorb as much of the urine as possible.

  • Use Paper Towels or a Clean Cloth: Gently blot the area with paper towels or a clean cloth to soak up the urine. Avoid rubbing, as this can push the urine deeper into the carpet fibers.
  • Blot from the Outside In: Start from the outer edges of the stain and work your way toward the center to avoid spreading the stain.

Step 2: Rinse with Cold Water

After blotting up the urine, it’s important to rinse the area to dilute any remaining urine and odor.

  • Dampen a Cloth or Sponge: Soak a clean cloth or sponge in cold water, then wring it out so it’s damp but not dripping.
  • Blot the Stained Area: Gently blot the area again to lift more of the urine out of the carpet fibers.

Step 3: Apply a Cleaning Solution

Once you have blotted the area and rinsed it, you can apply a cleaning solution to break down the urine and neutralize odors.

Option 1: Vinegar Solution

  • Mix: Combine equal parts of white vinegar and water in a spray bottle.
  • Spray the Area: Lightly spray the stained area with the vinegar solution, making sure to cover the entire stain.
  • Let It Sit: Allow the solution to sit for about 5-10 minutes to penetrate the carpet fibers.
  • Blot Again: Use a clean cloth or paper towel to blot the area and absorb the solution.

Option 2: Enzyme Cleaner

For tough odors, an enzyme-based cleaner specifically designed for pet stains can be very effective.

  • Apply Enzyme Cleaner: Follow the manufacturer’s instructions and apply the enzyme cleaner directly to the stained area.
  • Let It Sit: Allow the cleaner to sit for the recommended time to break down the urine compounds.
  • Blot the Area: After the time has passed, blot the area with a clean cloth to absorb the cleaner and urine residue.

Step 4: Rinse the Area

After applying the cleaning solution, it’s essential to rinse the area to remove any remaining cleaning product.

  • Use Clean Water: Dampen a clean cloth with cold water and blot the area to rinse out any leftover vinegar or cleaning solution.
  • Blot Dry: Use a dry towel to blot the area, removing as much moisture as possible.

Step 5: Neutralize Odors

To ensure no lingering odors remain, you can use baking soda.

  • Sprinkle Baking Soda: After the area has dried, sprinkle a generous amount of baking soda over the spot to absorb any remaining odors.
  • Let It Sit: Leave the baking soda on the carpet for several hours, or overnight, to absorb the smells.
  • Vacuum: Once the baking soda has had time to work, vacuum the area thoroughly.

Step 6: Check for Residual Stains

After the carpet is completely dry, check for any remaining stains or odors. If necessary, repeat the cleaning process.

Additional Tips:

  • Act Quickly: The sooner you can clean up the urine, the better your chances are of completely removing the stain and odor.
  • Avoid Heat: Do not use hot water or heat to dry the carpet, as this can set the stain and odor.
  • Professional Cleaning: If the stain persists or if your cat continues to urinate in the same spot, consider hiring a professional carpet cleaner.

Conclusion

Removing cat urine from carpet may take some effort, but with prompt action and the right cleaning solutions, you can effectively eliminate both the stain and the odor. Follow these steps to ensure your carpet remains fresh and clean.